Week two of the challenge at Unstampabelles
WARNING: Photo heavy
#58: Pocket Books/Letters or Gift Card Holders
TWIST include a crown

The prize
I decided to make another pocket booklet - a mini booklet
This one can be seen here on YouTube
I started with a 12 x 12 sheet and scored at 3", 6" and 9": turn 90 degrees and do the same.

Then cut up from base to 9; down from top to 3; and up from base to 9 as shown below

Starting at the bottom left corner concertina fold up, across, down, across, up, across and down

Yes, I have a different sheet now - the first one was too flimsy again so I went to a sheet of 12 x 12 Bazzil. Worked much better. You need to work out where the top is - if you look at your squashed concertina, you will notice on one side there are two solid folds - see above - across the top; on the other side there is only one. The one with one becomes the top. I attached a piece of paper to the top to make it clear - you can see it still in the photo 2 down.

I then started from the back and working forward, I marked with a pencil where the glue strips or double sided tape was to be place to form pockets. Mark first before adding glue - believe me, slow is best here. Make sure your first 'page' is left out as this is the cover page.

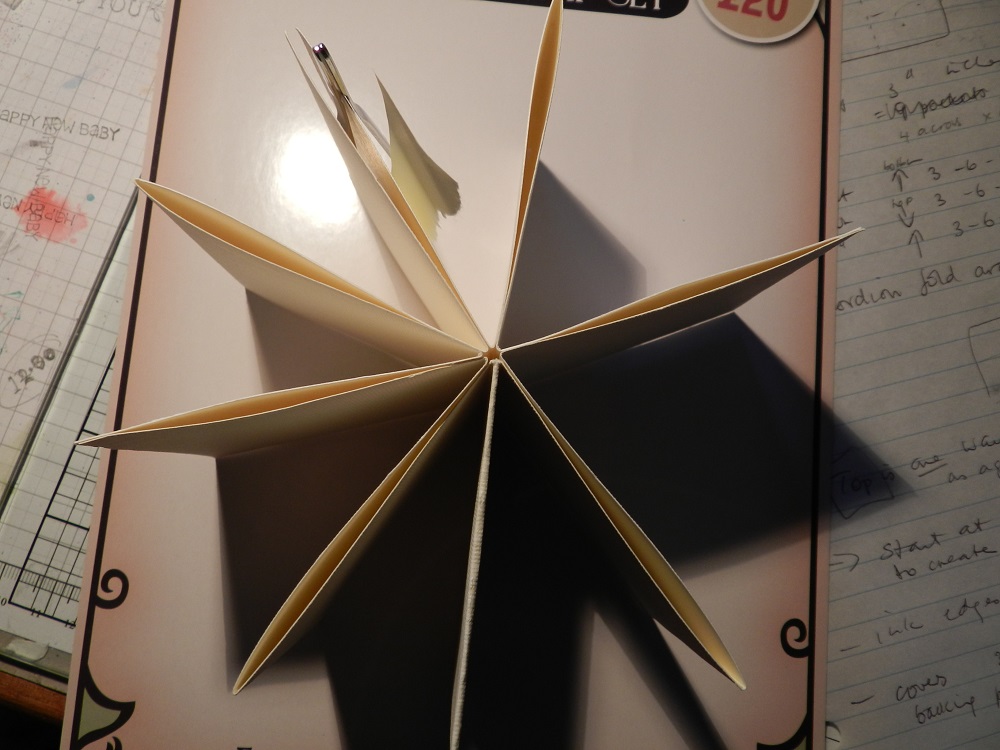
When you add the glue and create the pockets you get cover, three pockets - a blank - three pockets, a cover.You can see that clearly in the photo's; the paper and tweezers indicate where the two covers are and the pocket tops are open, while directly opposite the covers is a 'blank'.
Now cut out two cover sheets 3.25 " square from recycled card material, and the paper to cover these at 4" square. Glue the paper to the square card, leaving a small rim around the outside of the paper. Trim the edges of the paper, and glue the rim to the inside of the cover.

Can you see my notes while watching the video? I had to watch it several times to make it clear what I was attempting! Once I had the cover plates made, I inked the edges of my pages, including the spine

Then carefully attach the covers to the cover plates - I used double sided tape for this. If you want to you can add ribbon at this stage to go between the plates and the cover page, across the back of the spine, with enough length at the front to tie as a closure for the booklet. I forgot to do this, so made do with punching a hole in the cover plates front and back near the front entry, and tying some twine into them, which then ties together to close. It also suited my nautical theme better.
TIP: also make sure your plates face the same way - my cover paper has nautical rope and one plate his it horizontal, and one vertical!

I also inked the edges of my plates

The spine

Now you can decorate - I made 6 tags for the pockets - you could make two for each pocket I guess. These could also hold other material

I used papers from Culture Creation's Sea Breeze set to decorate.

You could journal on the pages or on the tag. You could add other photo's or remove the decorations and put photo's there.

They are just glued in with Sticky Strip

I die cut a few things too

And fussy cut a few others - my dies are on the blank pocket

You can do whatever you wish really

It's up to your imagination

The twist was to add a crown!

The resulting booklet really is quite a cute 3 x 3 inch mini album with front and back covers. It took one 12 x 12 and one A4 sheet of card (for the tags) and some papers to decorate.
Why not enter this challenge yourself - love to see what you create!
Enter your work HERE
1 comment:
Oh this is perfect Susan! I think I could use this to send my Mum some recent pictures of our move! Thanks for the inspiration 😊
Post a Comment