Wednesday, 2 October 2013

Crafting with Dragonflies and Gift cards.

Challenge # 12 : Make a gift box/folder with at least 3 cards


This fortnight CWD is challenging you to make at least three (3) small cards and a box/bag/purse/container to hold them.  We have two sponsors again this time:


A Day For Daisies -  with a $12 Gift Certificate to the shop


and 

Di's Digi Designs


My cards and the image on the box came from ADFD, who very kindly allowed the DT to choose an image to use. I used the image called Flowers in a Bottle. I printed them out onto XPress Blending card, after I had resized them to fit three across the page (Portrait).


I coloured them with Copics and cut them out to mount onto some folded card stock, to create five gift cards. I then created a small open-ended box using SU Poppy Parade card.  I just worked on the size of the cards, and then used a 2 cm base, and folded the two sides up, allowing a side seam of 2 cm each side.  I glued it together with red tape.


 I used a piece of ribbon threaded through and knotted inside the box each side.  I used a piece of scrap DP behind the image when I attached it to the carry box.


The five cards are folded from the top, and are designed to be part of a set to give as a gift.  If I was clever I woud have printed these off  directly onto the card, but I wasn't and I wanted to make sure each card is roughly the same as the other so I coloured them all up together. 


If I wanted to, I could have made five envelopes too - there is room in the box for them. 

I will enter these in the following challenges:
Chocolate, Coffee and Cards: Flowers
My Craft Creations: Anything Goes
Make it Monday: Anything Goes again!


Tuesday, 1 October 2013

Kitty Lane's Bather stamp

I thought I would add another Kitty Lane card today - they really are burning a hole in my hard drive, saying "blog me",  "blog me"!

I used this photograph to show the size of the card and thus the size of the stamp (in both rubber and digital) - this one is called Bather.  

I do love the vintage look of this - very 1920's in Australia!


Lots of orchard plants and only a few spikes - I didn't separate them last year and the pots are very crowded. However, it lets you judge the size of the card and therefore stamp.


I used Copics, XPress Blending card and SU card, plus some DP supplied by Kitty herself.  I added some wet embossing for the sentiment (SU EP) and three metal charms (?? no idea - think they are Making Memories) featuring sea creatures. I also tucked a postcard stamped by a LOTV stamp onto SU Very Vanilla. behind the image, as it suited the idea of a holiday and missing someone who could be there! I am not sure whose stamp the sentiment is from - sorry. 


I like the way it looks sandy! The EP is orange - SU Tangerine Tango. A close up of the charms too.


The postcard is also vintage looking!


An idea of the colouring and the stamp itself. It is inside a box except for the top of the ball and her feet. I mounted it onto black before adding it to the top of the VV card. Then the whole was mounted onto some Tangerine Tango card. 


Some seam binding (dark brown) and the DP was mounted onto black card before being put onto a piece of pearl white folded for a card. 


I love this image and found it very easy to colour.  I have it as a digital, so can change the size if I want but I didn't do this - like it as is. 

I will enter this in the following challenges:
Craft Your Passion:  use a charm ( I used three)
Make it Monday: anything goes usually
Red Carpet Studio: Pretty in Pink - yep, her bathers are pink!


Monday, 30 September 2013

One (Two?) Door(s) shuts(s) and .......

Well, that was interesting.  Gingerloft has closed as a Challenge Blog and as a member of the DT team I have just been denied permission to go to the Gingerloft DT blog. Oh well - life happens and I wish Tami all the best for her future.

There seems to be some strange issue with the Lollipop Ladies too, and Gin is not up-to-date with the blog. Guess that is another one that might be folding. Going from busy to half busy in a very quick amount of time!!

Just want wanted to share a quick card I made last week sometime. Saw an idea in a magazine and played with it. The sentiment is computer generated.


 Twine and bling come from SU and Annabelle Stamps
The bug was a freebie
Did a bit of pin work around the sentiment


The card is a commercial blank from Regal Press - I spent a lot of money there last week!
 Getting ready for Christmas!


Saturday, 28 September 2013

Kitty Lane's Newest Stamps

I am sitting here listening to the Grand Final between Freemantle and Hawthorn in the AFL, and it is already almost too much for my nerves. Go Hawkes!  So I thought I would blog a bit about Kitty Lane and her newest stamps.

Kitty asked me in late June to make her some more cards, but I was so slack, and so late getting them done - not because they are not super images to work with but because I was just overrun by life. Kitty sent me seven images, and I showed on yesterday of the Halloween Trick or Treat.

 Today I will show you Duck and Frogs.  Isn't this image so cute! So much fun to colour up as well.


Coloured with Copics and then die cut with a Spellbinders die. The card is XPress Blending card.


Do you see the little cloud.  It is a sticker from Collected and Co.

This is a sentiment stamp I have had for a while - Inkadinkado - and it is so useful.  It has been stamped with TH Distress ink. 

 I used some Stickles and then some stick-ons for the rain drops - these stick-ons come from Cloud9 Designs. They just gave it some more dimension.


The yellow card behind is created using distress inks on SU Whisper White, and was done a few weeks ago.  The ink was going to waste so I quickly grabbed a few pieces of waste card and coloured them up, so you will see a bit more of this type of background card again. It is mounted onto some SU Pumpkin Pie and wrapped around with a bit of pretty ribbon. The clouds and the circle are on dimensionals to give them height. 


It is a commercial blank card under all that, but the DP is a bit of old SU DP. 

I will enter the following challenges:
Creative Corner: The Great Outdoors
Cut It Up: die cut circles
ART Card Challenge: Anything Goes


Lollipop Ladies Challenge 77

Lollipop Ladies are up to Challenge 77!

This fortnight, we are looking at this great photo for inspiration - not lollies but sweets!

In fact they are Macaroons!

TLL #77 Macarons

Don't they look so delicious!
The twist is RIBBONS!

The colour's used here remind me of autumnal colours so we will go with the Northern Hemisphere and with a particular celebration that occurs around this time

Halloween!


This is Kitty Lanes great image found here - Kitty Lane!  This is coloured up using Copics after it was printed off onto XPress card.  The image is available as either a rubber or a digital image. 


Halloween needs a spider or two!! And a web - both are stickers!


The papers are for Basic Grey Steampunk series. So is the cardboard cat. The punched edge is supposed to replicate ribbon trim!


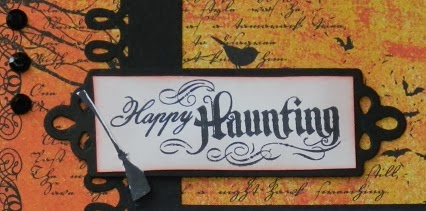
This sentiment is from Waltzing Mouse and the broom is too, stamped and fussy cat and attached! The die cut label is from Spellbinders.


The whole is a Halloween card! inside it says Trick or Treat!  I did add some bling - black - as well!

Why not enter the Lollipop Ladies current challenge - you can choose what you wish to match the inspiration photo and don't forget the RIBBON twist!

 Prize is a
$10 Voucher (thanks to  Andrea)
 
Please link up your entry here in the comments. There is no linky this week - Gin is in China!
* Prize will only be offered if 7 or more entries partake in the challenge.


I will enter this in the following challenges:
Inspire me Fridays: Anything Goes
DRS Designs Rubber Stamps: So Spooky its Scary!
Make it Mondays: Anything Goes


Monday, 23 September 2013

The Great Outdoors:


Gingerloft has a new challenge starting this week and it is for The Great Outdoors:  


My card features one of Tami's images from Gingerloft - Wintertree - and I have printed it off onto the XPress blending card, coloured it lightly with Copics, and then added a bit of Stickles to make the snow gleam. I added a die cut from a black scrap of the deer to the front and tied a piece of sheet ribbon across the front. I framed the image in one of the Spellbinder's Frames and cut this from SU Glorious Green. 


I used an SU Sizzix die to cut some snowflakes from various papers, and attached a small tag in white to this, after I had stamped it with the sentiment, which comes from Waltzing Mouse.  I used TH Distress Ink to do this. 


The background DP comes from a Christmas paper stack and I am sorry, I do not have the name of it. This is my second Christmas card for the year. It is on a commercial white blank card. 


This is taken in sunshine, and the green looks a bit different. You can see the embossing on the frame and the deer a bit more.

I will enter this in the following challenges:


Wednesday, 18 September 2013

Use at Least Five bits of DP Stash for Dragonflies

Challenge Number 11 for Crafting with Dragonflies 

is to use up those bits of scrap and old stash - at least five bits of Designer Paper - and in my case to clear the decks for the Christmas card rush! I also chose to make my first Christmas card for 2013 - I think I have been very restrained so far, but I have dived in and from now on, there will be lots of Christmas cards to admire and to wonder to yourself - will I get that one? Who will know!


Our Sponsors for this challenge are: 

7 Digis of winner's choice

Meljen's Designs

 4 digis of Winner's choice.

Meljen also allowed me to use a digi of my choice, so I chose a merry little bird singing his heart out! He is so sweet and is called little bird song. 


Yes, he is coloured with Copics and some Stickles and white pen have been added added.  I chose to make him a robin. They are such "in your face" little birds, full of vinegar and spit. They always make me smile the way they parade around, while the little dun coloured hen goes about her business without all the fuss. 


Another shot of him singing his heart out about Spring (remember, Christmas is in our Summer)! I masked him before colouring and used my Copic spry system to spray the blue sky background in, and then applied blender pen to the water droplets to lighten them up before adding Stickles to them. 


This snowflake was created using three different die-cuts added together using three different pieces of scrap card. I really like the middle one which is a Memory Box die cut, and the other two are SU. 


The background mount and background DP are left over from last years Christmas efforts, and the red background mount is a piece of 6 x 6 from a Christmas pad I have (one of the many, but it was loose so don't really know which one it belongs to); The blue card is from a 12 x 12 sheet of DP and it is mounted on a piece of red DP from a Bo Bunny pack of 6 x 6. That's five pieces of DP Hilde, PLUS the Merry and the snowflake - I win! The whole is mounted onto a white commercial blank card.


The Merry is a die-cut from SU's new Seasonal Catty (yes, I have them here if you want one). It is cut from a piece of scrap red sparkle paper (12 x 12 sheet from SU).The bird and the mount are also cut using  SU dies. The thinlit die with the Merry came out really easy and didn't tear - not sure if it was because that glitter paper is a bit stronger than ordinary DP or not but I was very pleased. I also forgot to back it with some sticky paper before die-cutting, so had to use glue to place it but even that didn't phase the die-cut and it behaved beautifully. 


Two more shots with the sun on the image - the Stickles on the snow/water droplets, the leaves and a bit on the twig and the sparkle on the snowflake and the sentiment, as well as the silver stripes on the background papers makes the whole thing really shimmery and pretty. Not too sure if you can see the impact here though.


I will enter this in the following challenges:
C is for Challenge: Make it Sparkle
Crafty Bloggers Network:  Things with Wings
Make it Monday: always Anything Goes
Christmas Card Challenge: incorporate music in your card. 


Using my Stash and Scraps

Remember shadow boxes?  I saw one which had been made for one of the challenges I am on a Design Team for (Crafting with Dragonflies), and I thought how wonderful that is, so I CASed it! Instead of using a photo frame, I used a small cardboard postal box.  I am using this for a half-way inspiration for UNSTAMPABELLES - another DT I am on, for the current challenge to use up our old stash/scraps! With this DT you cannot use stamps, rubber or digital. Just paper, ink and inspiration! I must say I had great fun creating this. 

This box has been used initially to post some goodies to me from one of the on-line shops, and then I used it to post some goodies to my MIL last year.  I found it when I was cleaning up her unit earlier this year, so I grabbed it and bought it home.


I undid it and glued the outside with some Prit glue, and stuck down some SU DP that looks like red bricks. Once it was glued down I sanded all the edges and made it look a bit vintage with ink etc. I then had an ideas I would die cut out a rectangle but soon realized this was not going to be big enough so hand-cut out the front square. 


Then it was a matter of decorating it. I used a piece of dollar shop 12 x 12 brick paper for inside, and a piece of granite paper for the outside back to cover up all the box and the addresses written on it. These 12 x 12's have been hanging around for a while now to be useful - I'd say about four years! Then I raided all the travel stuff in the travel box (from where I am still supposed to be doing the scrapping of our trip to Europe five six seven years ago !) and got some stickers, and rub-ons and stuff.


There are three stickers on the outside of the box as well as the die-cut. I have no idea whose stickers they are - sorry.  The die cut is an Alternations (TH) die, and I scribbled a bit of white gel pen on the rhs to indicate a light source. The fence is also an Alterations die, sanded on one side, and the Jalopy is too - that got sanded up a bit as well. All three were cut from scraps of card. 


The wooden sign post is from Kaiser (purchased earlier this year in Melbourne) and it has stickers, rub-ons and pen on it - some of the rub-ons are so old they would not properly release so pen had to be used!


The flower spray is relatively new.  I got it from one of the on-line stores during a sale - it's from Prima. There are two slightly different ones in the pack but this one suited very well. 


Behind the jalopy, on the back wall is a piece cut from a Graphic 45 12 x 12 sheet - A Proper Gentleman. It was put out in 2009, and I think I got it when the vintage craze first started - it has old ads on it and this image. It suited the story I was trying to tell here. 


He is very elegant isn't he.


The Vagabond is outside looking in.  I have a lovely print of a painting (purchased about 30 years ago in Paris) which has this same theme.  I loved it then and I still love it. It's pen and watercolour. 


I am not sure what I will do with Vagabond.  At the moment - it sits in the shelf and I smile at it when I go past! Hubby reckons I am a bit artistic! I laughed and laughed when he said that, but it was nice of him.  

I will enter this in the following:
Clear it Out Challenge Blog: for the boys; this is not a card but it could be......
Craft Room Challenge: use something wooden - the sign post is wooden
Make it Monday:  Anything Goes


Saturday, 14 September 2013

Smarties and Splodges for the Lollipop Ladies

Hi everyone - Challenge 67 for the Lollipop Ladies is based around a photo of a stack of Smarties:


The twist is to use a die cut or a punch somewhere on your creation.

 Now, for some reason we don't get many entries for this Challenge and we need seven of them before any prize to be issued. I don't really understand why we don't get entries, as the challenge photo's are really good and the twists are fun, and the inspiration from my team mates on the DT is out-standing. Why not have a go - or if you know why this one doesn't seem to work, let me know.....' cause I have no idea. 

 My thoughts of Smarties ran along these lines - the lolly where the dye does not run onto your hand when you grab a handful to eat.  Yummy chocolate insides and crunchy sugary outside - do you crunch or do you first suck off the sugar coating and then let the chocolate melt on your tongue? Dye.......splodges of colour......... splodges????? Mmmmmm.........out came the Tim Holtz Distressed Paint bottles, and BANG - three splodges before you know it!


I CASed this of course! Saw it first done in Craft Stamper mag, and had cut it out and kept it for my inspiration book - hurriedly flicked through and found it, and then had to look for a suitable flower. I selected a flower from SU Flower Shop set, and stamped it with TH Distress ink Soot.  This takes a long time to dry - be warned - and I marked the card so I had to quickly grad a black pen and doodle in some specks to cover these up! 


I used the same sentiment, and hand wrote it as well - my Grandaughter Lily told me the other day that my birthday card for her was "Totally Awesome, Nin"!  So, that's me - "Totally flippin' AWESOME" to be exact! The die cut is from Spellbinders - Labels.


I used SU Whisper White and SU Real Red to mount, and faux stitching with a black pen. The base card is a commercial square blank in pearly black. I tried to get in most of the colours of the smarties in the photograph - except for the mauve and orange.  

I will enter this in the following challenges:
4 Krafty Girlz: No 1: Anything Goes
Cute Card Thursday: Hip to be square - like the card