Wednesday, 27 February 2013

Happy Birthday Glenda!

A girlfriend has a birthday this week - we go painting together and often lunch together as well after!

I chose to use a LOTV image and CASed a card I had seen on their website, as I loved the way it was coloured.


This little fairy has always appealed to me - such a tomboy fairy she is......and I really enjoyed colouring her up and making her sparkly with spica pens. Can you see her glittering?  And the icing and flame on the cake. 

I used a doily from a kit I got from Bizzy Bec's and a flourish, which I die cut and trimmed, from Cherry Lynn.  The sentiment is also from LOTV and the pearls are Kaiser. The flowers came I think from Megs Garden (or BB?) - that's usually where I get them. The doily has a backing of PP scalloped circle (a big one). The image has been die cut using an SU frame and I sponged Momento Sky Blue onto it as well as going around the little girl with blue dots. 


The background paper is from the Firefly collection by Prima (love this) and I stamped some grunge corners on it (LOTV again) in Momento ink (brown) and die cut a Sizzix strip out of SU Pirouette Pink like the flourish and the sentiment. The whole is mounted on some SU Primrose Petals and sitting on a white commercial blank. 


I will enter it in the following challenges:
Craft Us Crazy: favourite stuff (the stamp and colouring with Copics)
Hanna and Friends: pink and brown - the theme of this card!


Sunday, 24 February 2013

Elephants!

Love elephants - they have such a knowing look......


I have the honour to be Guest on the Design Team for this week beginning Feb 25th for Love to Create.  The challenge is to
Wrap it Up!
(using string, twine, fibres, yarn....somewhere in the project)

 Jackie from Love to Create kindly sent me a digi of my choice to make my contribution to this challenge, and I chose an elephant! Not any old elephant of course - a flying elephant - in that it is a balloon! It comes from Eureka Stamps, who are one of the sponsors for this challenge.  The other sponsor is The Stampin Chef.

                                          
Isn't it cute!


Then the interesting part - what do I make with it?  My original idea didn't float, so I played around and settled on a three-fold-card, that opened down instead of across, if you know what I mean!

I have both my SIL and my MIL in hospital at the moment - so a Get Well card was in order! AH HA - light bulb moment!


The elephant is printed out twice in this size and twice in a smaller size (you will see why later) and coloured up with Copic pens.  I die cut one out and coloured in the background with a sponge and Momento Summer Sky ink to make it seem as if he is floating in the sky.  I then fussy-cut out the other one and layered it up onto the first, after wrapping some white string around the bottom of the balloon!

The sentiment is computer generated - I went online and looked up quotes about elephants, jokes about elephants, facts about elephants, images of elephants...................and found the sentiment on an image!
Once printed off I die cut it from the card and used the sponge to colour it up.  The flowers are from one of the very first stamp sets I ever owned - and in fact I was given it again by my DIL so for a while I had two sets! It is by Hero Arts and is called Bouquets of Wishes.  I coloured it up using my SU pens and huffed on it to stamp.  It is fairly open so I used my Prisma pencils to colour up inside the bouquet to take the white out. This is its very first outing! I wrapped some string around the bunch and together with the string from the balloon, took them down the face of the card into the second fold! You have to make sure that the card will fold when you secure the strings.


This little lady is from Annabelle Stamps and I have coloured her up quite a few times lately. Again I used Copics here.  She is standing holding the strings from the flowers and the balloon. This si where you can write your message if you want, or on the back. 

The third fold holds the punch line and the two smaller elephants! All coloured up and fussy-cut as described above, with strings attached and just floating away.....


The background papers are from Echo Park 6 x 6 stack Dots and Stripes, and the card is SU Primrose Petals 12 x 12 cut down and folded into a trio card. The card itself stands a bit like an easel card, but you could add a small hinge at the back of the first fold if necessary. 


I will enter this in the following challenges:
Craft Bloggers Network - anything goes
Forever Friends: Use an animal (the elephant!)


Gingerloft Design Team first burst!


Ribbons and Bows

This is the challenge for Gingerloft this fortnight.  So, shake out those ribbons and make those bows and create!

My card came about because I fell in love with the geisha image from Gingerloft, and couldn't get it out of my head. So I gave in and created a card based around this image. It was a bit hard to add the ribbons/bows but I managed! I started off printing off the image onto XPress Blending card and after letting it dry for at lest half a day, then coloured it up with my Copics.  I used the dot method to create a background for her, added lots of spika pen and edged the image with the back pen.


I then made a stick pin (I was fossicking in the stash and I found the fan and got the snake charm out and then came cross the green-topped stick and decided to add one) with beads and bits and added it to the mix. Then I got out all my Japanese background papers, and had fun trying to decide which one to use - after wasting half an hour I got the hubby to choose one - but I still think it is a bit busy.....mmmmm


I love the snake (dragon) charm - no feet so has to be a snake - and the little fan has been there for a long time as well.  I coloured her up as a traditional geisha, but her lips should be blood red! I have covered them with red spika anyway. 


The kunji (chinese letter symbol) says Congratulations.  Japanese use kunji as their formal writing. Again I have added red spika onto the black.  I added gold spika to the flower, and pink spika to the apple blossom. I mounted the red paper onto black card, and then onto red card folded.  

I will enter this in the following challenges:

Saturday, 23 February 2013

What is a Nerd?

Well, its a lollipop - or lots of little lollipops! 


With the additional challenge of Glasses

Guest DT spots are able to be won each fortnight
and our sponsor this fortnight is: Annabelle Stamps *

$10 Voucher (thanks to Andrea).

Prize will only be offered if 7 or more entries partake in the challenge.


I personally have never tried this particular lollipop, so don't know much about the taste but I do recognise the Willy Wonka Chocolate Factory illusion. Loved that book and the little grandies love the DVD.

I started by thinking of all the various Nerds I knew or knew about and came to the conclusion that without Nerds, many of the luxuries in my life would not exist! Then as a retired teacher of secondary students I am aware that many Nerds were subjected to bullying and scorn from their more 'trendy' peers! The fact that most Nerds are earning much more and living a much better life than their contemporaries gives me some slight satisfaction now!

It started with me getting messy with Distress inks of various ilks, masking and a bit of trial and error work.  Then I laid down the first coat of colour, and polished it off. I drew around it with a black pen - used some new masks to get a busy sort of background going, and then stamped a few things. The sentiment is from SU and the main image is a foam stamp from La Blanche.  It is actually quite sharp.  


I then just layered up with a Tim Holtz die cut, some bling, butterflies and the conversation die cut on which I wrote the only formula that has stayed in my brain!  Hope its correct! There is a connection with the butterfly (flight) and the plane (flight) - nearly added a balloon too but couldn't find one that matched the colours! The glasses are doll glasses (or for teddy bears) and have been in the stash for a loooooonnnnnngggg time (at least three years)!


So, my card reflects all that cogitation: the background is distress ink (trying to reflect the colours of the packet) with some masking and some stamping, before adding various items. Steampunk style! Why don't you have a go at this challenge?  Use the colours, or the shapes or the idea or all three!

I will enter this in the following challenges:
Oldie but a Goodie: Bright colours - and my oldie is the glasses!
Challenges4Everybody: always anything goes

Friday, 22 February 2013

Embossing

Just playing with the new Stampin' Up embossing folders and stamps that have arrived in the last few months and not been used yet.  Tried to use only SU products here. 

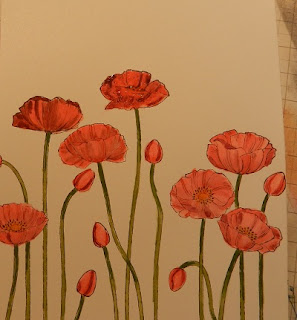
There are so many thing you can do that is called embossing.  In the first one I have stamped the flowers Pleasant Poppies with StayzOn Timber Brown onto Whisper White, coloured them up using the SU pens and a waterpen and then when dried, smooched over the top with the embossing pen and some clear embossing powder.  I forgot to wipe the pen clean after doing the flower tops so some of my stems have a pink look too!  I then tried to die cut a top on the image but ruined it, so ended up putting it in the Tulip embossing folder and cutting it to a smaller fit.  Rubbed some blue ink over it to make it look like sky behind the flowers. I tried several ribbons on the top and eventually settled on the big red satin one (not SU) and added a small tag, stamped with a sentiment from Silhouette Sentiments and a small flower from the same set - I used the pens to ink up the stamps. 


Poppies after first colouring them up - top two have been embossed


This shows the completed card - if doing this again I would reduced the stem length to drop the flowers down the card,  and just use the embossing folder to give a border.  

The next one has been hanging around for a day or two - I had an idea and tried it out but didn't really like my skill level but I distressed the edges a bit and decided it would do. I used an embossing folder Flower Garden and embossed some of the delicious new Core'dinations Gumball Green card.  I then distressed the embossing with a light sanding. This brought up the pattern.  I then used a pen (Raspberry Ripple) and tried to carefully colour in the flowers.  I used Gumball Green  on the stems etc. Didn't like the effect so as I said left it laying around for a few days and then decided to complete the card.  Mounted it onto RR and a piece of DP was added, stamped the sentiment from Love and Sympathy in Close to Cocoa onto Very Vanilla, and punched it out.  Punched out another shape in RR and split it to attached behind the first label, and added some bling from the stash. The ribbon is from SU. The base card is folded VV card stock.


The third one is cased from the Stamping Impressions site.

I used an embossing folder from Couture Creations called Hedged Maze, and Very Vanilla card.  I brayered some Primrose Petals ink onto one side of the folder case, and carefully added the card before putting it through the Big Shot. This was trimmed and layered up onto the PP card, and added to image from one part of Pleasant Poppies coloured up the same as before with watercolour pen but not embossed. I die cut a label and cut the bottom off it, added a sentiment from Bring on the Cake 2, stamped in Close to Cocoa straight onto the PP card.  I added a piece of ribbon and some pearls. 


When I was outside taking photos of these scared the lights ou of two or three small skinks who were sunning themselves. I got a shot of one who was initially frozen to the bricks and then scampered to the bottom of the old BBQ and froze there, so I got another shot - so pretty but so fast! 

Ready to run!

Daredevil Skink clinging to the vertical bricks


Wednesday, 13 February 2013

Butterfly Wishes


I have just agreed to be part of a new Design Team - Gingerloft  - a digital stamp group.  I want to know more about this side of crafting and how to use it, and Tami was kind enough to invite me to join her DT.  Watch out for my first challenge!


Meanwhile I have gained a Guest spot on the DT for Love to Create for this month as well, and am happily planning my task for that one.  I also have one more exciting thing to share - but not just yet!

I have another card to share anyway - made it from a card pack (one of two I got from Bizzy Bec's last year!) which I thought would challenge me to use them as you get 4 small papers (double sided) and some embellies and ribbon and a couple of die cuts. I find myself trying to use everything at once - if I did the card would weigh a tonne and look rubbish! This means I have stuff left over for another card or two.  I think this is a good thing........In the meantime, I think I will just gather some items from my stash every now and then and challenge myself to use them in the same way.  The funny thing was, as I worked on this card, I began to add die cuts from my own stuff and embellies and reorganise what I had - it was an interesting experience.


Taken in full sunlight


Up close in sunlight


Taken in shade.

The white flower die cut was in the kit, as was the background DP,  the strip of paper cut from the DP and reversed, the flowers (but not those stamens) the ticket, the doily and the small red bling bits - the squares and the butterfly.  The rest was mine - the fence, the red border behind the fence, the big butterfly, the backing card and card blank, the ink used around the edges of the DP (Distress Antique Linen and Tea Die).  The stamens that came with the kit were yellow but too big for these small red flowers, so I used ones I had already (Meg's Garden is a good place to get these things).

Hope you like it!

I will enter it in the following challenges:
Make it Monday: Anything Goes


Sunday, 10 February 2013

Oodles of Love for Birthday

Today is my eldest grandaughter's 20th Birthday - Happy Birthday Charlotte. I remember her as a fat little Buddha sitting on the floor, and dribbling, and just a hint of a smile on her little face........6 months old! Now she is 20!!

And Beautiful!


Happy Birthday Kiddo!

A recent redecoration of the bedroom in a Parisian theme allowed me to make this for her for her birthday. A photo frame from Kaiser, which has been painted, aged with TH crackle paint and rubbed back a bit with Antique Linen distress and Barn Door Distress. The papers were freebies with a magazine - carefully put aside for this very project which was then left to the last moment! Rub-ons, charms and various embellies were added, and some bling!


Butterfly was coloured with Copics and after debating for quite a while the wooden bicycle was not coloured at all.  Perhaps it should be white (or black)????

The shoe charm is glued in with Crystal Effects. 


Her card used an image from Stampin' Bella - Uptown Girl Lucille - and some more of the papers backed with black card, and on Bazzil white cut and folded into quite a big card.  The lovely diecut black frame is from Sizzix (isn't it nice that they sell them now in their own little packet for storage a bit like the SU ones?) and a recent purchase (as was the stamp!).  I coloured Lucille in using Copics, and added some bling.


I used the Spika pens to add some sparkle to her dress, shoes and hair ornament, and to some of the hearts! I know this image is probably for Valentines, but I thought it was so pretty for a birthday as well. 


I got carried away with my spotty shadowing but liked the effect. 


I will enter this in the following challenges:
Totally Gorjuss: Love (and the funny thing is I purchased a Gorjuss girl at the same time as this stamp, but didn't use it because I thought it was a bit young for Charlotte!)
Southern Girls: Bling it on!
Dilly Beans: Hearts

Thursday, 7 February 2013

Which one is better?

I have been experimenting.  Another CASe card - and this one used gallery glass to cover three chipboard squares to make faux tiles. I don't have gallery glass so I tried with Crystal Effects (SU) - big failure.  Then I tried with clear embossing - a bit better. However, when I put the card together it didn't look right, so I added two more pieces of background paper.  Now I am just confused!


I used all SU stamp sets (Silhouette Sentiments, Bloomin' Marvellous) and scraps of paper from a Raspberry Road freebie paper collection, various lace pieces, SU satin ribbon sprayed with mica sprays (blue and red) and a chipboard tag freebie from Pink Paislee.  The three chipboard squares were punched form some packaging and oversprayed with the same mica sprays as were used on the ribbon.  (Tattered Angels). The ink used for the images was StayzOn blue and the sentiment is Momento. 


I stamped onto the chipboard tag with the bird image with StayzOn. I added a small birdcage charm. You can see it hidden behind the ribbon.


The card lacked something I thought.


So I rummaged through the box and found the reverse side of the Background paper, and added it to the top behind the white scrim. I added a strip of the background paper to the bottom behind the lace.


Not sure what happened.


Over to you - what happens next?

ED: OK, I have taken off the top pink strip and it looks a lot better - thanks for the feedback!

Wednesday, 6 February 2013

Just Playing

It's quite warm here at the moment - as nice day for a change......although there are fire warnings out.....and I am down in the workspace getting away from the air conditioner upstairs and listening to the Prime Minister's 11 verses West Indies at cricket at Manaka in Canberra on the radio.

Tassie is doing well in shield today as well - Ponting is currently on 62 - against NSW.  We have five of our currently players away on National Duties at the moment and considering the fact that we barely have over half a million people here on the island state, that is not a bad ration!

I have made a card - CASed from a card in the magazine Simply Cards. Not sure who the maker was, sorry. If it was yours, thanks for the inspiration.  In keeping with the resolution to use up my old stash, I cut the flowers from a piece of card I have had for over three years - yeah, one down! Only about a thousand to go.....I also used up bits and pieces from the shoebox I have allowed myself to keep of scraps (current) and I am determined to used these as well!


The background card is from Verve packaging as well, and the yellow strip is also from packaging.  

The first photo was taken in direct sunlight and the second in shade. There is a lot of washi tape (I love this stuff) and some run-ons and some pearls for bling.  Ribbon stems were taken off clothing labels! The lacy stuff is sticky-backed and I have had a roll of it for over two years - have now started to use it (thought it was too good to use before!)............believe it or not, there are two strips of alternate paper there too (scraps).  NO ink used! I was determined to do without it - however, I do think it could have had a bit around the edges of the various contrasting cards. 


I will enter this in the following challenges:
Lollipop Ladies: Challenge #62 - Candy Hearts (the colours match) - I am no longer on the DT for this challenge but decided to enter their first challenge for 2013....Edit: just been asked to return to the team and have accepted! 
The Shabby Tearoom: HB in pink and blue (yep!)


Monday, 4 February 2013

Doilies are all the go at the moment!

I love a pretty doily.  And I must confess I have a couple of doily stamps as well as the real thing in a variety of shapes and designs. However, today I felt like doing something a bit different with the doily.

It just so happens that the new Challenge #19 at  Unstampabelles this month incorporates using a doily (or two+) in your artwork. Cardmaking Online is sponsoring this Challenge! This can be one of the many paper ones, croqueted, stamped or doodled or........


Cardmaking Online is our sponsor this month with a $25.00 gift certificate for the prize.

This is the link..... 

http://www.cardmakingonline.com.au


If you are not aware, Stampin'Up have just released their new seasonal catalogue (Making a Difference for 25 Years) - yummy, yummy.  In it are a few new things - for example some kits that make creating a bit easier when you have that mental lapse (a bit like I am going through at the moment!). I really liked the soft colours in a kit called Artisan Embellishments Kit and it included two doilies. I thought that I would start with that. 

However, when I got it out to look, I decided I wanted to go in a different direction (how often does that happen to you?), and got out my can of air and spray trigger, and my Copic Sketch pens.  I selected three colours - B01, B16 and BG13 - and started with the lightest.  I taped a doily with an open lacey look to a  piece of white SU shiny card, and sprayed across the top of the doily gently, increasing the depth of colour until I liked the look of what I had. You have to go slowly so the doily does not flap about and ruin the stencil effect.

Once I released the paper doily from the card, I was pleased with the outcome and the fact that I also had a doily coloured up for a future creation as well!


This became the background for the some of the items from the kit, arranged on top, with a rub-on sentiment. The flowers were separated out and the stems twisted around a stick to look like vines.  I added some Stickles to the flowers and some leaves punched out from the SU Bird on a Branch punch. 


The bird is a chipboard piece painted gold and smeared with Stickles, as was the butterfly charm, which had been air-sprayed at some time and both had been hanging around on the desk for a while. The heart button was to be the centre piece and placed on the cardboard die which had been wrapped around with ribbon.   It was all mounted on the card, and onto Primrose card, before layering this on background paper and white folded bazzil. The ticket, ribbons, die and the buttons are from the kit.  


The ribbon was then also tied in a bow to one of the hearts on the die.  The background paper was from one found in the middle of the mess when I was cleaning up the stash, and I do not know who made it (it might be Kaiser?). I completed the card by using a rub-on for the word 'celebrate' on the bottom of the diecut under the wrapped ribbon. 


So, I used a doily BUT not exactly as I expect it was thought it would be used. AND I have a doily to use in my next masterpiece. I call this style of card OTT - and will have to construct a box for it to be posted! but sometimes OTT is OK!!


I will enter this in the following challenges:

Craft Your Passion:  Pastels (mainly blue and pink)
Creative Creations: It Must be Love -Yep!
Love to Create: Celebrate
a.muse studio: doilies!
Ginger Loft:  Love is in the Air

Friday, 1 February 2013

No Mojo!!

I said I would be crafting - and I did but not do really inspired crafting......these two images from Christmas cards were just laying around after I had cleaned up the work area. I didn't feel like throwing them out and then one of them got caught up with the yellowish die cut negative and so this is what happened from that......


The swag is from Verve (a die cut) and the stamp is from Annabelle Stamps.  Card and background papers are from the shoebox of stash that was just too good to give away!


Guess I will use them for letter cards, so will make an inset that allows me to write a letter or note to someone.  Cute little critters, eh!