Showing posts with label cards for sale; SU products; handmade cards. Show all posts

Monday, 19 January 2015

Another card for Unstampabelles Challenge

Well, we have just had a record (since records were first taken) downpour for Summer for a 24 hr period in Hobart, and the biggest since 1917 anyway! It rained! On the mountain it was over the 150 mm but we got 71mm around here - the temp was still about 20 though so it was muggy as well. 

Mosquito weather! Bugger - they like my blood! 

It stopped raining sometime last night, after drizzling all day yesterday after the downpour the night before, and the bay is a dirty brown colour from the runoff from all the dried up dirt etc. I can see some blue skies but only a little peeking through the clouds! It's supposed to be summer!! Our poor cherry growers have lost a lot of their crop and the stone fruit growers (yummy apricots and peaches) are also despondent but the apple growers say they can hear the apples growing! My tomatoes are not doing that well - only 4 so far! Enough grizzles! At least the flowers are enjoying the rain!

Begonias - the pink one is out but the yellow one is only just heading a flower.  The pink one has through out a leaf mould - not sure what to do about that!


 I am showcasing another card I made for the Challenge #43 at Unstampabelles for January.

The theme for January is

This is supposed to be Thanks! It is a die from SU and is raised up using dimentionals.

The twist is to showcase something out your window!


The prize is I will be offering a gift voucher to the value of $25 Aust on Stampin' Up products - please note this will include the postage to where-ever the winner lives as well!

Standing at my working desk  I look at this view all the time - that is the lamp in the middle!

When flicking through a magazine I purchased before Christmas and hadn't really studied, called Die Cutting Essentials from the stable of the papercraftmagazines.com, I came across an article called "5 quick tricks with ....... a tree die" by Jo Kill. (page 66) It inspired me to create the following in an attempt to recreate my view!


The layers of paper scraps are meant to represent the foreground, the water and then the hills in the background, in an arty type of way.......


I was going to stitch this all over the card but firstly it hid too much and secondly my hand held sewer purchased from the supermarket has a mind of its own and my hands cannot control its progress very well! So I cut off the left side and used it as a net curtain screen!


Why is my tree on the right not the left? It fell there! And picking it up and replacing it was not an option!! - so my view is sort of mirror imaged.


We get lots of birds in our garden - well, we did until the cats moved in next door - hopefully the birds will return soon in the numbers they were before - lots of little green finches!
All layered up onto some card to represent the curtains!

So, my picture outside my window number 3!

You too can look out and them make a card to represent what is outside the window
Enter it at Unstampabelles and remember
NO STAMPS please


Sunday, 2 March 2014

Trying out Colouring Techniques

I have some new stamps from Stampin' Up (actually, I have more than a few, but who's counting, right) and I thought I would use two of them  -Vivid Vases, and Blessed Easter - and conduct a little colouring technique experiment for myself. I stamped them both once onto XPress Blending card with black Momento ink, and supposedly twice onto watercolour paper with StazOn black ink.  My StaZOn was a little dry and I had to water the pad with some refill ink, and it took a lot! I ended up with two reasonable vases and on OK Easter one, and after I had taken to them with some fine black pen they were more OK. I then tried several ways of colouring them in - watercolour pencil, SU markers and a water paint brush, and Copic pens. 


Can you guess what is what?


This one is using the markers and water brush. There is a background of pale blue but it is hard to see here. The image is mounted on a piece of card from packaging, and the screen is also from the same thing. This is stuck to some SU Coastal Cabana, with a couple of bits of SU bling. The sentiment was restamped in Momento onto a scrap of white card after I cut off the poor stamping beneath the vases. It is all mounted on white card. 


This one is using the watercolour pencils (Inktence) and the card used for mounting is SU Pacific Point and the DP is from Theresa Collins Sweet Afternoon. The butterfly is vellum. 


Here I used the Copics. Ribbon is from the stash and the DP is De Lovely by Cosmo Cricket.  The mounting card is SU Melon Mambo and so is the card the little dohickey in the corner is die cut from - this die is from MFT.


A comparison of the three styles of colouring.


This is SU markers, water misted onto the SU waterpaper card.  The embellies just sort of grew as I looked at the white space and kept adding: lace from stash, SU ribbon, a flourish bling strip coloured with a pink Copic and the DP is from my stash (unknown). The brad is also from SU. The image has slipped I noted in this photo and have since had it replaced on the card. 


This one is the Copic version - a piece of scrap pink card behind it and the corner thingy (MFT) is from the same card. 

Well, that is my experiment for the day. I have used lots of different ways to colour before but just wanted to see how they looked on these particular images.  Thanks for looking.


Saturday, 28 May 2011

CR84FN

I decided to have a go at a challenge this morning, so looked at the colours of CR84FN challenge #29; these always seem to me to be the colours for sympathy cards ( plum, light plum and kraft), so that's what it became. I used the sketch at CPS #129 to create the card and all the card itself is made with SU products except for the bling, which is Kaiser.


Here it is:


The ink colour is Elegant Eggplant. The image behind the sentiment is stamped in Momento London Fog and coloured in using Copics.  Both it and the sentiment are from the set Thanks for Caring and so is the inside sentiment.  The DP is a scrap of old SU DP.  The ribbon is from stash and the central panel was die cut using the Spellbinders Nestabilities Ovals and Scalloped Ovals in the Cuttlebug. 

I am crafting all day today so look out!!! Have a good one folks. 

Tuesday, 6 July 2010

Another Birthday in July....

This month there are a lot of birthdays....and one special one is that of my friend Bev, who turns 70 on Friday.  This is the woman who introduced me to sailing, and to my husband.  So, you can see she is a special friend and someone who is full of positive energy. This birthday for her will be lowkey as her partner is going into hospital on Thursday to have a knee replacement done.  We had a celebration last night for her at my house with my family who all know her as an 'aunt'. It was fun.


Her card is simple and the charms are nautical for a reason. The card is from the Coredination's Whitewash collection, and the ribbon is from Joann's in the USA. The numbers are handcut.  The card went through the cuttlebug and was embossed with a Tim Holtz embossing folder.  The bottoms of the card and paper are punched with SU border punches. The base card is SU Elegant Eggplant and the whole is swiped with the ink in the same colour around the edges. The button is a heart one from a local craft shop with the back of the button cut off.  Simple and elegant, like my friend. Cheers. my dears.......


Monday, 31 May 2010

'Just Scraps' are not just scraps!

I have just recieved a very nice email from Jean at 'Just Scraps' telling me to select a paper piecing package from http://www.paperandpiecings.com/ as I had been selected for this week's bounty!  YUM. Thanks Jean! I, of course, chose a frog! I use a lot of scraps in my work - I have three whole drawers full of paper and card scrap  I cannot throw anything away that might be useful one day!

 I have a couple of cards to put up as well, constructed over the weekend. The first one was a construction only as I had made all the bits a while ago - the girl is a digi image coloured with copics, when I was first learning to do this.  I masked her out after colouring her in and sponged green ink around the image.  She is printed up on SU Glossy White and I only had about 6 copics then, so colour choice was limited.  It is mounted on royal blue scrap and the ricrac matches the purple well.  The flower and leaves are from another digi from Fred She Said, coloured with copics as well and then with Dimentional Magic - just to see what happened! The leves and petals curled nicely and the shine is excellent. The card is a commercial blank from Regal Press.


The second card is also using SU Glossy White and sponging, but this time I sponged some SU inks (Old Olive, So Saffron, Melon Mambo and Apricot Appeal) on the card to start with and then stamped over this with a Memento London Fog ink. I used copics to put some additional colour onto the image and drew in the flight of birds in the top RHS.  The stamps are two sets - SU Lovely as a Tree and WMS Irish Blessings for both the house and the sentiment. I used my stamp positioner to line up the horizon on the two stamps to try and give an illusion of one big picture.  I cut the resulting image into three and mounted it on black and then again on SU Melon Mambo card. The sentiment is stamped with SU Close to Cocoa ink.


The third card again used the SU Lovely as a Tree - but this time it is on SU Whisper White and the stamp was coloured using SU markers. The sentiment is from SU Greetings Galore (no longer available). I mounted it on Chocolate Chip then Close to Cocoa card and used a piece of My Mind's Eye DP, Bohemia BH2158 as background and a piece of ribbon from Kaisercraft. The buttons came from my Mum's old button box - and it sent me back on a journey of memories as I sorted through the various colours and button there; took me about an hour to get the buttons because I was reliving old times. The card blank is Close to Cocoa.


Card number four is another cased idea, using the sentiment, which I created on the computer. Cut out and mounted on Lovely Lilac card, and sponged with Elegant Eggplant it looked OK. The stamp is one from Inky Antics, stamped onto Canson 250g paper, and coloured with Copics after stamping with Memento London Fog.  However, because it was not dark enough I then went over the outlines in black pen. The background is from a booklet of paper  - DCWV Pocket Full of Posies - and has sparkly bits on it as well! The card is a commercial blank from Regal Press.

The fifth card is a case using the SU Think Happy Thoughts stamp set, and it was meant to be quick and simple.  However, when I stamped the flowers onto the Bashful Blue card I didn't get them in the correct place, so they are not aligned; the sentiments are stamped in Melon Mambo and are OK, but the centre one was out of align and the flower in the middle wasn't in the middle (you cannot see it now because I used one of my delicious new flowers from Celebrations Wild Roses to cover that up); and I used some bling to disguise the other mess; and to top it all, I didn't like it once it was done either, so a revamp was necessary. I then mounted the Whisper White onto Melon Mambo card, added the flower and bling and decided it would do.


The inside has a white inset stamped with other sentiments and several flowers from the same set as before.

Sunday, 16 May 2010

Sunny Sunday

A post from a sunny day - this is the card I was putting together while Jessica was sailing in yesterday.  It is made from paper piecing and it was fun to make. I used some scraps to make it and the card was made from a piece of SU Always Artichoke green. 


The background paper was made several years ago when I was first playing with mica paints and sprays.  The green inked bottom was a left over from something else I was doing on a piece of SU Very Vanilla and I had used the spare paper to protect the desk from overspray, and then found that the effect was too good to throw away.  I took a bit of this and crumpled it, and then swiped it with the SU Chocolate Chip ink pad and then ironed it to make it lie flat on my card.  This was an attempt to make it look 'old'. The mica overspray is also glittery in gold and green and in the light has a shimmer that makes the card look modern also. The dinausaur was freecut following a picture in my ideas book, and I cut out his arm seperately, and his teeth.  I used my decorative scissors here and simply slipped the cut piece into the mouth of the beast.  Some black pen for his stripes and black and brown inks to dirty him up and he looked OK. I used dimentionals to lift him off the sheet a bit.  The sentiment is typed up on the computer onto Reflex paper and then coloured with a variety of Tim Holtz Distressed inks to make it look old and dirty.  This was layered onto a scrap of green card and the whole image was then layered onto Close to Cocoa


I then thought it needed to be completed by a further comment inside and used Reflex paper again.  I layered up the comment after dirtying it as before, and glued it into the centre of the sheet.  I stamped the bottom of the paper with three different stamps, two from SU Pocket Silhouettes stamped off in Old Olive and Close to Cocoa, and then a Verve stamp set (Love is???) in Chocolate Chip. I was trying to create ancient swamp idea! I did have fun making it though!

Saturday, 15 May 2010

Jessica Watson's Day!

I have just watched young 16 year old (nearly 17)  Jessica Watson sail over the finish line in her boat Pink Lady  in Sydney Harbour in what is a glorious autumnal day, surrounded by hundreds of other boats and thousands of Australians cheering her on, and I was so suprised to find how moved I was when that hooter went off! She has just sailed solo around the world for 210 days, and after being at sea for seven months, how must she be feeling! Congratulations Jessica, and all concerned - an amazing and inspiring journey. 

She is nearly at the steps of the Opera House and I need to go and watch soon again - it is compelling television and I am glad she is home safe, but I worry for her welbeing in the next few months as she settles back into life at home.

So, I have some cards -  but they are sympathy cards!  They are cased from the ideas book of course - but there is one that is about teenagers and sort of connected to Jessica - here it is!


It is a sympathy card for parents of teenagers who are beginning to test the boundries!

It's an easel card and I used the computer to generate the wording.  The card is inked with SU Pink Pirorrette, and I have cut out the heart and the rose and stuck them over another heart on the front, and the rose next to the 'Hang in There' sign in the middle.  It amused me and I made it with scraps from a magazine, to see what it would look like.  Don't know if I would use it but can imagine a situation where someone might need to be given a 'hug'.


This card is made with three different stamp sets, one from Waltzing Mouse (the circles), one from SU (the swirl) and the Butterflies are from TJ Designs.  The origional had a big round patterned stamp which I do not have but thought this button circle from Faux Circles might work - I have added two other cirles from the same set to try and add to the depth of the circle pattern as well to replicate the look of the origional. The SU Baroque Motif swirl is always useful and the butterfly from TJ's Songbirds set has had a few outings. These are stamped on acetate with black StayzOn and coloured with Sakura JellyRoll pens, and then fussy cut and glued on with Dimentional Magic.  I tried to colour in with the Copics but they only picked up the black ink and would not stay on. The card is SU Confetti White (torn edges) and this always has a heavy blotting paper look I think, which suited the card,  and the ink is SU So Saffron.  This is layered on black and then again onto So Saffron card.  The sentiment was printed off the computer on the card before it was torn. Here is an upclose of the butterflies. Now realise I need to draw in the feelers on them! I will do that now.


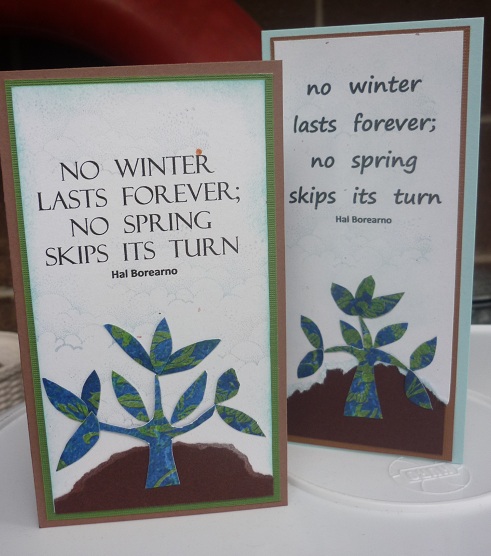
The last two cards used the same sentiment but I printed off two copies of it using different fonts to see what the difference was - and I like them both, actually.  Again, I used SU Confetti White paper and stamped a Stamp World cloud image (Cloude) using versamark over the sentiments.  I then wiped the paper over with pale blue chalk, and put some SU Blue Bayou ink on the edge of the LHS one.  The tree is paper pieced together from bits cut from imaginisce Go for Baroque - Blue Blooded card. This was freehand cut, doing the trunk and the leaves seperately.  I tore off a bit from the bottom of brown and each one is layered up differently, one using a grene scrap and one a brown, and one is on SU brown card and one is SU Blue Bayou.

 You can see the clouds a bit better here. I do like the look of them.

Cheers, and happy card making!

Tuesday, 11 May 2010

SPOTTY CHILD!

Well, apparently I am a child because I have MEASLES would you believe! Have had them for over a fortnight so no wonder I have been feeling a little off colour - probably picked them up in the airport or on the mainland somewhere - that's what you get for going off-island! Viruses and germs!  However, am feeling a bit better and managed to make some cards over the last few days, even if the brain was a little slower then normal!


Made this one a few weeks ago and just competed it - it is from scraps and used a digi image called Citris Topiary, coloured with Copics and a frame made from Nestabilities Label 1, a rub-on and a button.  It was origionally for a colour challenge that I didn't get to enter using yellow, brown and green.

Friends Having Fun - Colour Challenge Two

I have decided to enter this competition - using the three colours turquoise, yellow and terra cotta. There is a bit of terra cotta in the colouring on the bird image! Just peer really closely!


This one was intended for my MIL for Mother's Day (not sent yet). It containes images stamped from two different sets - the butterfly is from a TJ Designs - Song Birds set and the bird is a freebie stamp created by Elusive Images, and again coloured using Copics. I also used Dimentional Magic on the bird and the buttlerfly to make them shine.  The card is all SU card - Craft, Teal, Black, and Whisper White - and the punched edge is a Martha Stewart punch Doily Lace. Some ribbon, lace, flowers, SU crystal bling, and two pins completed it.


This one was created using the polished stone method - I stamped the images three times with Versamark ink and embossed with White Opals embossing powder, then over stamped with Versamark with the second stamp. I used two images from the SU set Oh, So Lovely. I spounged the shiny white card over with SU Elegant Eggplant ink and polished off the residue with a tissue.  I then cut the images into three panels and mounted them on white card that had been swiped with the ink around the sides. This was then all mounted again on a piece of Elegant Eggplant card.  I added a Tim Holtz tag and some ribbon. I used another SU stamp set for the sentiment on this ( Happy Moments).  Inside I put some purple paper I had floating around in the stash and a piece of white stamped with one image from the set in the same ink, and repeated the idea on the front of an envelope.  It was supposed to be for a challenge that I am too late to enter into now, but here it all is!


You can see inside a little better but the colour is not correct as it was taken at night under a poor light.

Now I am off to make some more as the itching has stopped and the steriods have started to work better (no, I will NOT be able to complete in the London Olympics now, so the Pole Vaulters can all take a sigh of relief!) and I have started to feel MOJO juices rising! Au Revoir to my sister-in-law and her husband as they leave today for five weeks touring in  Europe - soooooo jealous - and hope the ash and the Greek protests are all in the past and the Euro is not too bad for you!

Friday, 19 February 2010

We have had the most beautiful late summer weather lately - lots of blue skies and sunshine! I have been doing a variety of things BUT I have also been scrappin cards - continuing the task of being inspired by cards created in January's UK Magazine CARDS.  I have tried some new techniques and learnt a few things that I cannot do as well as can do - and expanded my repertoire in thinking about what can be done where along the way.  Here goes:


This one is made of strips of paper embossed in some of the few embossing powders I have - it was SU Confetti with a punched edge (Fiskars) layered onto grey-blue card, and then lilac and a base card of pink. Three buttons and a sticker completed it. It didn't take long to make and I think it looks really classy.  My embossing powders are all subtle and so it has a vintage look.


This does not look as good as the one in the book - that was lucious - but I had a go at freehand cutting and making flowers and while it is not a technique I am confident with, with the proper papers I think it would be good. These are scraps and I stamped them with background stamps - SU Sanded and Lace and an Image Tree script stamp.  I used SU inks that were about the same colour or deeper than the card.  I cut out the flower shapes freehand and then sprayed then with water, scrunched them and flattened them again to made up two flowers, with a pair of brads from Cloud 9  - Brittany's Castle. The Friends square brad came from the same set. Some pink ribbon over some brown card, which had a scalloped edge top and bottom (cannot see the top) and my sentiment was from Waltzingmouse's set - Irish Blessings. So is the shamrock and both are stamped in SU Pink Passion on craft.


This one looks simple but took me hours - I was running out of steam!!! I had the teapot in a set of stamps by Tim Coffey, called Daisy Delight.  It has a pretty little butterfly in the set as well, and I have used that a few times and a leaf once but not anything else - and this is one of my first ever stamp sets. Anyway, I stamped the teapot in SU Ballet Blue, on Whisper White card, cut it out and then stamped the image onto the background card, masking the teapot first. This left the steam curls on the background paper (I used scraps), and I then layered the teapot next to it using dimentionals. My sentiment came from a pack of clear polymer stamps (no idea) and the stitches were from a packet of rub-ons. A couple of buttons, and some pretty ribbon, and it was done.  The casing of this can be seen clearly but it is not at all like the origional - I thought mine was a bit 'mmmnn - bland' myself....... BUT, I did have a go!

This was my attempt at a very pretty scallop card in pretty vintage cards of pinky fawn and blue, with green highlights.  Mine is not as dainty. I had a DP piece from Rhonna Farrer called In the Round so used that to get some scalloping going - I had a scrap piece of Vintage Moon collection - Moon Glade by Holly McCaig which I used and a sticker for the sentiment.  I stamped a flourish using SU Baja Breeze ink from the SU Baroque stamp set and a chipboard flower which I had painted, sprayed with vintage mica inks and then wiped this off and decided to lightly emboss with a bronze embossing powder. All on the yellow card SU Barely Banana, with a ribbon trim on the base of the card and some bling bits as well as yellow satin ribbon.


This next card had been made back in January, but never completed. I used a peel off on to acetate sheet, then coloured with alcohol inks (I tried severl different types of pens before I got some to stick and stay) and then put into a window in a plain white card.  I use gold trim peel-offs to make a window frame.  Inside the card I stamped a 'branch' using a flower from the SU Oh , So Lovely stamp set and SU markers.  I made it so the bird seemed to be perched on the branch when the card was shut. An interesting experiment.  The inside of the card was then covered with DP scrap. The sentiment comes from SU Pocket Sillhouettes.

Monday, 15 February 2010

Rainy Days.....

Yesterday it was rainy in the morning and so I spent the time playing!  I purchased the latest edition of the UK magazine Cards  a few weeks ago and while I have read it from cover to cover, I had not cased anything much out of it - so decided to work through page by page to see if any cards there inspired my mojo to compete - and this is the result!  I am only through the first 10 or so pages. Have also added it to the Little Paper Shop Monday Challenge LPSC55 - Distressing:


I used their colours and idea of the 'quilt' but my stiches are faux and my flower is not the same - I also like the way that two of the squares sat off as if unfinished or as if the butterflies had knocked them askew, rather then the uniform one is the magazine.  My butterflies are not the same either.   The butterflies are from two different stamping sets, coloured with SU markers and then coated with Dimentional Magic to make them shine. The feelers were drawn in after they were fixed to the card front. Cuttlebug embossing on SU card used and a brown SU marker for faux stitching. The stem and leaves were rough cut out of scrap card.


You can see the faux stitches here and the fussy-cut butterfly, and the embossing.


Next one was using buttons - I am always reluctant to use too many in fear of using up my stash but in reality I have so many it makes little difference to the stash pile!  I had to use the bottom of a 'y' letter to make my inverted comma and I think it is upside down now I look at it! An embossed piece of card (Swirl) which has the scallops punched out of the bottom edge. Some SU designer paper scraps and we were away. The letters are left overs on a set of big chipboard letters I have in the stash without the name of the manufacturer on the sheet. 

The next one had a simple flourish on craft and three flowers of felt with button centres and a big single letter 'K" on the right hand side.  Mine is a little different but is inspired by the same design.  Yes, I use the SU Baroque  flourish, but the felt flowers I have are only pink and white and I wanted to use the autumn colours here, so I just used three yellowish flowers and added three different buttons.  I then decided to sponge some Old Olive everywhere and add the red ribbon to lift the design. The 'O' is not quite big enough and looks a little out of place - it is meant to be given to a friend whose first name starts with 'O'. So, its like the one in the magazine, and its not.


This one was inspired by a series of flowers across a ribbon in the middle of the card, with faux stiches aroung the petals.  I don't actually have a flower stamp that suited that idea, but I do have this stamp.  It is a Stamp-It one called Framed Daisy Trio, and it thought I could stamp it several times and cut out the flowers and make them string across the middle, but I then had a better idea. After colouring one set in completely using SU markers and chalking the paper to make it more suited to the colour scheme, I then coloured in just the flowers from the second stamped set, and fussycut them out; attached them over the first ones and coated them with Dimentional Magic to make them shine.  They really pop off the page. I used my Fiskars punch to create the border on the bottom of the yellow card and my background papers are from the scrap drawer. I used some green card instead of ribbon across the centre of the card behind the stamped image, and again inside the bottom of the card so that it showed through the decorative cut. Some black Thickers for the sentiment and I was pleased with the result.


I then decided to change the colour scheme and ended up going pink because I could find several different things in pink to embellish the card with - wonder why? The sentiment is from a Verve stamp set and the bird is from the SongBirds stamp set from TJ Designs.  I used SU Pink Passion ink and card and layered up with a piece of teal card from somewhere! I used the computer to generate the saying and then punched the edge with the Fiskars punch. Some other bits and pieces, and some black ribbon from the inside of one of my jumpers, and it was done! I tore the edges of the paper and deliberately glued the ribbon on less than carefully to make it look avant guarde!


This is the last one - some layering up required here.  The colour scheme and the idea came from the cased card, but the stamp used is a Hamilton Art Stamp - Watercolour Daisy, coloured (in watercolour) with the SU markers waterbrushed. A Verve sentiment stamp, onto white Bazzil and layered onto blue; and 4 orange sparkly brads; layered onto Confetti Kaleidoscope Suprise "Cousins" Flowers DP, orange bazzil, SU Whisper White all on top of a blue bazzil card base.  Now I look at it I need to have shortened the flower topper a little to make it fit better on the orange base.

Better go, the girlies have arrived for their regular Monday night roast (Roast Beef tonight) - and NO homework tonight!  We might go for a walk!

Tuesday, 13 October 2009

How does your garden grow?

Our garden is full of weeds - poor hubbie was in it for last few days and only managed to clear a small patch.  When we got back from the mainland, the rain and warmer weather had encouraged great growth so there were many, many weeds to be got rid of.............and it was green waste day yesterday. I cannot do much to help - my back is a good excuse - so he does most of it by himself. Today has been sunny and warm except when it wasn't raining, so no gardening got done. He needed a break anyway as he was a little tired - I forget he is nearly 75 at times.

Today was painting day and we had a demonstration on the use of galze mediums in your oil painting, and three different ways of going about it.  Still a little confused but will give it a go this week and see what happens! Perhaps I will show you what I have done, perhaps not.

Meanwhile I have made some cards! Suprise, suprise.  Again, they come from my collection of pictures I have torn out of various magazines, and so are to a great extent cased.  Please accept my deepest gratitude all you great card makers you, if you happen to see my attempts at your work. Most card used  is SU card and inks ditto.  The first card uses an Artee Stamp Double Daisy, which I masked to create 4 flowers.  I coloured it in using SU markers and a watercolour brush. The sentiment is a Virve Stamp from USA, one of several I got last month. The ink is SU Baja Breeze and I used one of those baking papers from the set I mentioned last time that the family gave.  I used gold card to back all these. Inside I used another Virve stamp sentiment as my verse, stamped in blue ink on a cream paper inset.


This one is on SU Craft paper, using SU Chocolate Chip ink to smudge the edges.  The little card has felt flowers on it and the 'parcel' was created using scraplings pasted onto cardboard. Inside onthe inset I used stickers from Joane's on birthdays.


This one is too big.  I am thinking of framing it rather than using it as a card.  The flowers were fussy cut from a sheet of Pink Paislee Spring Fling Collection: Spring Flowers, and placed over another piece from the same collection: Tree House. I hand drew and cut out the bird, and mounted it on left over gold card. I used a scrap to create the fence, after carefully giving it a scalloped edge. The letter stickers were from the many I have in the box - maker unknown. I 3-D'ed the flowers with dimentionals and only stuck down the bottom of the stalks and the center of the flower to give it more life. Inside I printed a sentiment I made up - and glued another flower next to it, plus one on the envelope. I must admit it is pretty.