Monday, 13 June 2016

A Hard Cover Pocket Book for Unstampabelles Challenge

Week two of the challenge at Unstampabelles

WARNING: Photo heavy

#58: Pocket Books/Letters or Gift Card Holders 

TWIST include a crown


The prize

I decided to make another pocket booklet - a mini booklet
This one can be seen here on YouTube

I started with a 12 x 12 sheet and scored at 3", 6" and 9": turn 90 degrees and do the same.


Then cut up from base to 9; down from top to 3; and up from base to 9 as shown below


Starting at the bottom left corner concertina fold up, across, down, across, up, across and down


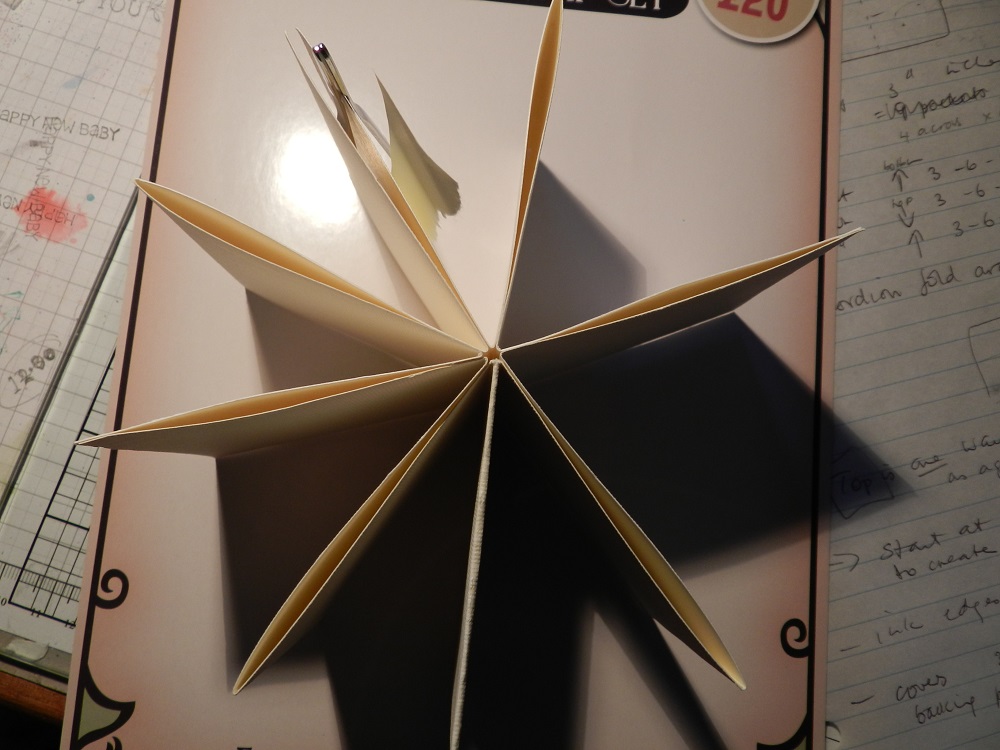
Yes, I have a different sheet now - the first one was too flimsy again so I went to a sheet of 12 x 12 Bazzil. Worked much better. You need to work out where the top is - if you look at your squashed concertina, you will notice on one side there are two solid folds - see above - across the top; on the other side there is only one. The one with one becomes the top. I attached a piece of paper to the top to make it clear - you can see it still in the photo 2 down.


I then started from the back and working forward, I marked with a pencil where the glue strips or double sided tape was to be place to form pockets. Mark first before adding glue - believe me, slow is best here. Make sure your first 'page' is left out as this is the cover page.


When you add the glue and create the pockets you get cover, three pockets - a blank - three pockets, a cover.You can see that clearly in the photo's; the paper and tweezers indicate where the two covers are and the pocket tops are open, while directly opposite the covers is a 'blank'.

Now cut out two cover sheets 3.25 " square from recycled card material, and the paper to cover these at 4" square. Glue the paper to the square card, leaving a small rim around the outside of the paper. Trim the edges of the paper, and glue the rim to the inside of the cover.


Can you see my notes while watching the video? I had to watch it several times to make it clear what I was attempting! Once I had the cover plates made, I inked the edges of my pages, including the spine


Then carefully attach the covers to the cover plates - I used double sided tape for this. If you want to you can add ribbon at this stage to go between the plates and the cover page, across the back of the spine, with enough length at the front to tie as a closure for the booklet. I forgot to do this, so made do with punching a hole in the cover plates front and back near the front entry, and tying some twine into them, which then ties together to close. It also suited my nautical theme better.
TIP: also make sure your plates face the same way - my cover paper has nautical rope and one plate his it horizontal, and one vertical!


I also inked the edges of my plates


The spine


Now you can decorate - I made 6 tags for the pockets - you could make two for each pocket I guess. These could also hold other material


I used papers from Culture Creation's Sea Breeze set to decorate.


You could journal on the pages or on the tag. You could add other photo's or remove the decorations and put photo's there. 


They are just glued in with Sticky Strip


I die cut a few things too


And fussy cut a few others - my dies are on the blank pocket


You can do whatever you wish really


It's up to your imagination


The twist was to add a crown!


The resulting booklet really is quite a cute 3 x 3 inch mini album with front and back covers. It took one 12 x 12 and one A4 sheet of card (for the tags) and some papers to decorate. 

Why not enter this challenge yourself - love to see what you create!

Enter your work HERE


Sunday, 12 June 2016

Stop Press: Dragonflies Challenge wants Dragonflies (or Butterflies)!

Yes, you read that correctly


Crafting with Dragonflies has a new challenge


It is to make a card with a dragonfly (or a butterfly) as the main focus


Here you are Hilde..............

Again, I am late - it seems to be a constant with me lately and I hate it!

However, finally got it completed and photographed:


I smeared ink onto a surface sheet, spritzed with water and laid the watercolour paper over it swiping the card through the  wet ink to get a graduated background to represent ground and sky - sorta!

Stamped on some foliage with Stazson black ink and coloured with the SU markers
I used SU inks and the stamp sets are two new ones from the catty
Fabulous Flora and Flowering Fields

There was a bit of masking there too
The sentiment is from the first set
The dragonfly is a cheapie from a $2 shop - I had a sheet of three in varying sizes


Light hitting the card in a different direction shows the colours in the dragonfly winds


The photo below shows the card under lamp light but you can see the Wink of Stella sparkle better on all the flowers


Mounted onto a red card and then onto a piece of Bermuda Bay card for the blank.

Please go to Crafting with Dragonflies to see what else has been created by the excellent (and punctual) design team

PS: Hilde LOVES Dragonflies!

Monday, 6 June 2016

Challenge #59 at Unstampabelles for June

Hello - a new challenge at Unstampabelles and it is 

 Pocket Letters/Books or Gift Card Holders 
TWIST include a crown

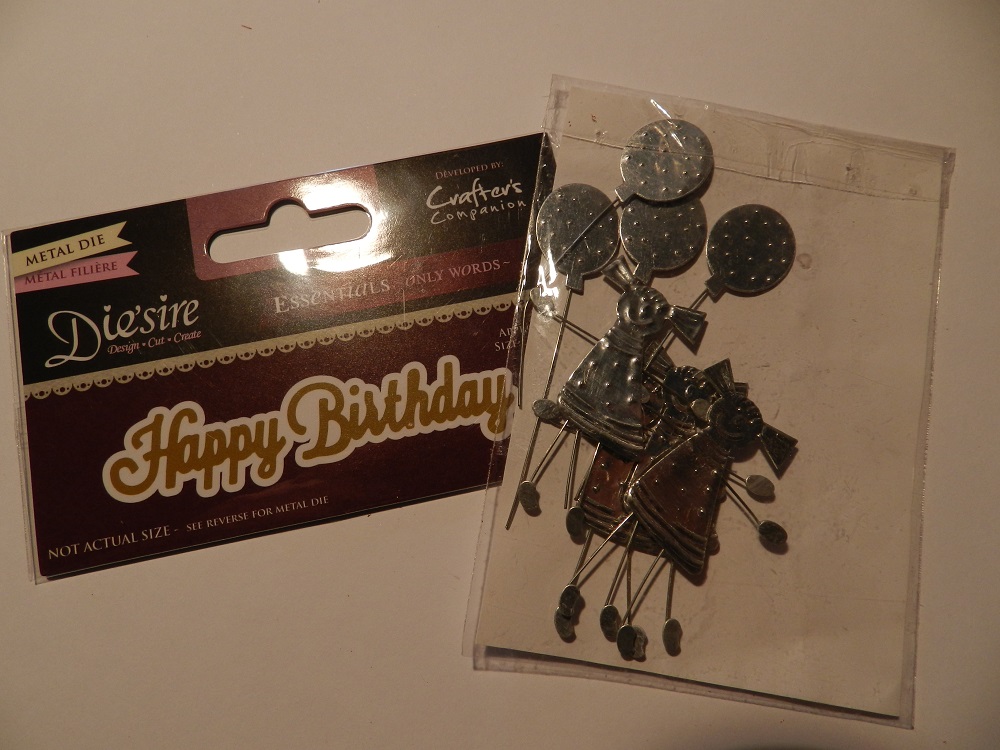
This die is the (random selection) prize


I chose to make a Pocket Book using a sheet of 12 x 12 Designer Paper (SU)

I probably should not have used that DP and gone for a thicker more card-like one as this DP is a little flimsy for the work required of it.

I got my recipe for this from CC on YouTube

I also forgot to take pictures in the early stages
However, after following her instructions I got to my folds and created a booklet with eight (8) pages and each page had a small pocket in it to add either an image or similar - I planned to add a tag to each pocket


This is what it looks like before the spine goes on - note that the middle section is glued together


This is creating the spine from card


Once the spine was on, I set about making the tags


You can decorate these anyway you want of course, depending on their use


It stands only 4 inches tall


Four sections, two tags each section


I tried to tie ribbon around aas a closure but it was fiddly, 'cause I didn't do it before I put the spine on, which would have been a much better idea, and more tidy.  Then I found an elastic hair band in the exact pink shade I needed - yyyeeessssss!


It was too wet to photograph outside so I took the shots on my desk but the colours are a bit wonky!

Anyway, this is a mini pocket album, with tags, ready to go
It could be a specific organiser - say individualised for Christmas for present ideas for family members,  or organisation for an event.

 Easy to use and then to so store or throw away at the end. 

Let's see what you come up with using the theme 'pockets'!


Tuesday, 31 May 2016

Eclectic Ellapu has a new June Challenge for the Purple Team - Weddings!

Do you know about Eclectic Ellapu? Elaine,the boss lady has two teams - pink and purple - and each one has a different theme, although occasionally we all play together. This month the team I am in (purple) has a theme of

WEDDINGS!
(It is June, after all)


I know, it's winter here - but winter weddings can be pretty spectacular as well

I had planned to do an extravagant multi-media thing, but you know what has been happening in my life lately, so I decided to do something a bit simpler and make a card (boring, I know)


I went to Pinterest for inspiration, and ended up combining several - about three actually - ideas into one card - sounds simple, right? Wrong of course - once I began to construct this I discovered it was not as easily as I had envisaged (of course) and it took me quite a time to get all the bits together. In saying that, it was quite fun to do so that is the main thing!


I started with a heart die cut out of some pretty embossed white card; and some doilies
It took me about 30 minutes to get the skirts even remotely right -suffice to say this is my version of the one I saw. Ribbon sash, pearls and some bling finished off the dress.


The tuxedo was quite easy to make and I took it slowly and thought before I made each piece so it worked out quite well. Even the little black ribbon bow tie (recycled clothing ribbon) worked as I wanted it to - amazing!


The base card is from SU of course - craft with glitterly silver stripes on one side and red triangles/hearts on the other


A flower - sparkly - and another bit of bling


Inside I had another swathe of bling, and stamped a sentiment from Suite of Sayings


The dress is very frou-frou of course - not at all the kind I would wear myself


It was hard to photograph as it would not sit nicely but you get the idea
It will fold flat for posting


So, let me and the other teamies at Eclectic Ellapu - Purple Team see your wedding card. You have a month to create!

I am entering this in the Bizzy Bec's June Challenge: anything goes

Saturday, 28 May 2016

Didn't Froget this time!

Today is the day for a new challenge over at Crafting with Dragonflies, and for the first time in what seems like months, I have managed to get something made in time!


I am a Stampin' Up demonstrator - pretty slack one really - but the other day I got not only my latest order from the new catalogue (due out next month) but my badge for being a demo for 5 years! Nice.


This card comes from a Hostess set available in the newest catalogue  called Love you Lots, and is inspired by another demonstrator BJ Peters. I was going to use the new colours but realized I had no DP or ribbon yet in them, so fell back onto some older inks and DP - Pretty Petals - and some washi tape from long ago.


My heart punch came in useful as well, and I water coloured the frog using the inkpad and a water brush. My base card is whisper white and so not that good at taking watercolour paint, but for such a small area it was OK 


A bit of ribbon in a bow

The background is Pacific Point

Simple but effective. 

You have a fortnight to enter your card - always a card - using an animal in the images somewhere. 

Monday, 23 May 2016

Challenge #57: Creative Upcycling at Unstampabelles - final week

Yep,it is the final week to enter the challenge at Unstampabelles

The theme is 


Creative Upcycling

This means that you are to recycle something creatively - that is use something you would normally throw away in a creative way - not just to use materials that are old. 

TWIST use something you have had in your craft room for a year or more

There is a prize - with an extra surprise thrown in

Mine for this week is another toilet roll project

I followed a tutorial by the Craftaholic Witch and can assure you, her's is much better than mine!

I worked with a normal roll but would think of using a stronger roll such as a kitchen roll of paper as the toilet roll was a bit flimsy. She gives no size instructions but I went with halving the roll, and then taking a 2 cm off the end of one. These smaller two were the main bits for the box.


Next you cut two circles for a lid. Now, my tutor told me that I had to glue them carefully to the end of each cut roll. Not so easy to do. I ended up using a circle of paper inside slightly larger than the roll, and glueing that to the lid and the inside of the roll and even then it was not that stable. Perhaps strips across the lid first, and then glued inside .......


Anyway, I just ran glue around the edge and tried to get them to stick.


Then you take a strip of card (mine was about 4.5 cm wide and enough to make the inner circle of the roll. This becomes the inside of the box, and creates the lip for the top to sit on. 


Once it is constructed, you decorate it.


My red flower is well over a year old, and so are the red buttons.
The ribbon around the base is also recycled from a flower arrangement 


It is cute - I am currently waiting for all the glue to dry though to see if it is sturdier.

A good little gift box for a small gift - suitable for jewelry or for a silk item (?) if squashed.

It took me about 3 hours of fiddling (plus dealing with hubbies constant interruptions) to make. 

You can go to Unstampabelles and see what else is there to inspire you before entering your own work.

Friday, 20 May 2016

How Bad am I??????


It was a new challenge at Crafting with Dragonflies, where I am suppose to be a Design Team Member, but I got so caught up in looking after the husband after his hip operation, I didn't get my contribution made or up on time! I can only hope that Hilde has a very forgiving nature.........(hint).


The theme is (was) Congratulations!

My card is suitable for a wedding, birthday or anniversary celebration


Yes, I have a new Spellbinders die set - Art deco - and I tried it out with another set making the gold bits - Imperial Gold. This last set has sat in my stash for quite a while and hardly been used because it does not cut out the shape, only embosses it and I had forgotten this fact when I when I went to use it. I had to carefully snip around the outside the detach the bits of gold card I didn't want seen!

All SU card and embellies except the card blank (Regal Press) 

Please enter the challenge at 

You still have 9 days to go


Monday, 16 May 2016

Boxes of Washi tape......


Well, really there is one box but it is huge!


I think they multiply when the lid is on and it is dark.....

Anyway, what to do with them......

I needed to make something for the Unstampabelles midway post too

for Challenge #57 - Creative Upcycling

with the twist of using something oldish from your stash!

Pinterest gave me an idea, and I ran with it

The one I saw had tissue paper on it, but when I went to use that it tore all the time, so even though I did glue some pink tissue to my little memo, I eventually had to cover it up with tape


The book cost me $1.85: it is one of three I got over 2 years ago from a throw-out bin at Big W

The cardboard cover was free packaging with an order - my recycling bit

The ribbon was also a freebie from a magazine, but it was not good quality and shredded a bit


I stitched the ribbon through the spine of the cover and the tissue paper, but when I put it on the memo, I put it upside down so my pages are upside down now - I was working in a hurry.......


Halfway through putting the washi tapes onto the cover - you can see the tissue paper clearly here


But it tore so I had to cover it over with tape
I tried just a ribbon bow to hold the booklet together but it was not that successful (too much pressure), so I added a bulldog clip


I added some beads to the ribbon to make a page marker, knotting the ends to keep the beads in place. 


I think I would need to plan this out better in future if I was to make another one but for the time being it will be OK for my handbag to make and keep notes as needed.

Why not try to upcycle something yourself and enter it at