Monday, 25 November 2013

Late Inspiration for Unstampabelles Challenge

Merry and the team are still taking entries in our current challenge at Unstampabelles - which is to use vellum - and I was late getting a mid month card up for the team - to be honest, I was too knee deep in Christmas cards to even think of it until it was too late; I kept thinking I had a few more days but somehow that day between Saturday and Sunday skipped past and it was too late!

So, I think I will use this card as a final flurry inspiration - see, it took me about an hour, starting from scratch and no experience! A poking tool, an image, some vellum and an embossing tool (or empty biro) and Bob's your proverbial uncle - if you had an uncle called Bob!

I had a go at Pergamano  - I had a kit purchased from Regal Press in Launceston and had it for a while without touching it. Found it while looking for something else - doesn't that tell a story - and decided to make a Christmas card to amuse myself  - I used the chalk to colour initially but decided I wanted more colour and used my SU pens - Pool Party and Pink Passion, with a bit of Summer Sun. Working from the back, I added them to the image and it is a lovely subtle look.  The vellum is quite think of course. 


The sentiment is a rub-on and the ribbon a bit of SU Pool Party seam binding. 


I am not very clever using the tool that cuts the image out of the vellum and didn't want to tear it so decided to let it stay as it was - I would need to practice perforations (sounds rude really). It has a lovely raised edge effect now. 


The vellum is folded and wrapped around the base card and attached with a strip if two-sided tape hidden by the ribbon. A delicate card. 

If I can do it - you can do much better! Have a go - there is still time!

I will enter this in the following challenges:
Amusing Challenges: Anything Goes
Challenges 4 Everybody: Anything Goes
Pile it On: Non traditional Christmas


Sunday, 17 November 2013

The Squirrel and the Fox - first post for me as DT member


I think I am more like a Squirrel (especially with stash) than a Fox (LOL)!


However, I am a new member of the team at The Squirrel and the Fox. You should go over and have a look at the work they are doing. It's amazing. Leave them some love too.

My first challenge  #57 -Violet

 is to support Mag's B's (member of DT team) daughter who is fighting Hodgkin's Lymphoma 

so we have an extra prize donated by Mags B and her daughter


BUT the sponsor for this one is 

who will supply two prizes for this challenge: 
One for the winner and and we will do a separate draw for those using a MIC image.

Both prizes are a AU$15 voucher to spend in the online store.

Make it Crafty

WOW - great prizes!

My project does not use a sponsor image - I came on board a little too late to get one - but I have made a violet themed card. 


This is an image (digital) from Sweet and Sassy (I confess, I decided to go and buy an image from the sponsor but then got a bit confused and by the time I realised what I had done - used an image from the wrong sponsor - it was too late!  Hopefully this will not be too much of a problem!).  It was printed off onto XPress Blending card, coloured up with Copics, with added Stickles for some sparkle.


The sentiment is from and SU set called More Merry Messages.  It is stamped in SU Perfect Plum ink.


The image and the sentiment are on the same sheet, and it has been smooched around with some TH Wild Honey ink, and then mounted onto SU card - Wisteria and Perfect Plum. The ribbon is from the stash and unknown.


The background papers were from a freebie - and caused me no end of strife as they are thinner and so caught on the two-sided tape and tore. I ended up with what I have and nothing else. A bit of white pen to make some false stitching covered up one bo-bo!


Three bits of bling also added for some sparkle and balance. 


Wednesday, 13 November 2013

How OTT can I go?


Apparently quite far.

The latest challenge at Crafting with Dragonflies is to use a stick pin.  


This challenge is being sponsored by Crafts and Me, and they gave us three images to use. I chose mine because I wanted to make it unusually Christmassy and I was (sort of) CASing a card I had seen on LOTV. However mine turned out nothing like that one, and so it is just inspired by it!

(Heads Up - Crafts and Me are having a massive clearance sale at this moment)


Before I show you my addition to the challenge, I just want to let you know about one of my doors - this one is called the Squirrel and the Fox and yes, I am on the DT team. Exciting! I cannot wait to get my first post up for them but at the moment they are having a challenge about animal antics and it finishes pretty soon, so if you want to have a go - GO. Now, back to the challenge at CWD!

I decided to colour my image with Copics and then used the Stickles heavily. This was of course after I printed off the digi onto XPress Blending card, and cut out the image after it was coloured up. 


I am not aware of the name of this angel, but I am sure if you copy this image and paste it in an email to them they could find her.  Love her eyelashes - she came with them!


The Noel sentiment is one of LOTV's Grungy Christmas ones from last year. 


Here are my two stick pins that I made by adding the glass beads to the pearl stick pins. I got the bits from Bizzy Becs. They are spotted with gold spray which is at the end of its time and has gone all gluggy on me despite the good shaking I gave it to make it mist. It rained instead. The background is firstly some white DP with embossed music on it with white. This came as a large sheet of 12 x 12 from Hot of the Press.  Then the pink card has been put through an embossing folder from Craft Concepts, and then sanded lightly, and mounted onto some SU Red Rose. 

You can see the Stickles here

While the angel looks as if she is mounted on white card here, it is in fact gold mirror card from SU. The card is a black commercial blank from Regal Press. I have no idea where the flowers come from - they were just in my stash. I added some gold flower centers from Bizzy Becs too.  The pink ribbon is also from the stash - unknown. The leaves also. The gold ribbon behind the image (and under a snippet of lace) is a Touch of Class parcel wrapping ribbon. 


I just kept layering until it looked about right. It was pulled apart several times. It had to compete with that image. 

More shimmer

It glitters and glimmers and shine in real life

Why not go over to Crafting with Dragonflies and see what my team mats have come up with - amazing stuff! You will be thoroughly inspired. Also, Hilde has a little freebie available for you. 

Then it will be your turn to make something that uses a stick pin and if you want to, go over the top!

I will enter this in the following challenges:
365 Cards: Raise at least four things from base of card - flowers; sentiment, image and leaves
Bearly-Mine Challenges: Christmas in Pink
Crafty Hazels Christmas Extra: anything Christmas (I was asked to enter this)


Saturday, 9 November 2013

Last Post for the Lollipop Ladies

Hi Peeps!

Some sad news - I have come to the end of my term with the Lollipop Ladies and have only this one last post for them.  However, you know that saying about doors - one closes and another opens?  Well, there is one open door (more about that later - I am very excited about it) and one partly open door in front of me and I have some thinking to do........those of you who know me will know that is not my forte! However, picture me hunkered down - thinking!

On with the post ....................the theme for the Lollipop Ladies this fortnight is 


Farewell Cake


with the additional challenge of  Sentiments


Guest DT spots are able to be won each fortnight
The sponsor this fortnight is: Annabelle Stamps *

$10 Voucher (thanks to Andrea).

Now, I haven't seen too many of these around although I had a retirement cake made for me when I retired by my friends - it was a blackboard and chalk shaped cake 


 Here is the card


I used SU card and DP and some bling and a charm.  The ink is also SU Pool Party.  The black card is a commercial blank. The edges of the Whisper White and the other colours - Pool Party and Pacific Blue are roughed up.  I used the big background stamp SU Wonderfully Worn and put the card on top of the stamp after I inked it, and used the roller to press the card into the ink but the card shifted - oh no! However, I liked the effect so used it anyway!


The sentiment is from LOTV Set 64.


The little charm is attached with a yellow thingy and red paper twine.  The flags are from scarps of SU Poppy Parade and so DP that came with the SU This and That book. 


I added the bling to balance the red. 

So, what are you going to make?  Why not pop over to the Lollipop Ladies (pop over, get it???) and investigate the other cards and things made by the rest of the team and then have a go yourself!

I will enter this in the following challenges:
Crafty Girls Challenge: Anything Goes
Crafting by Design: Anything Goes with Smeared Ink - I smeared my background when I was inking it!
Creative Craft Challenge: Words

Monday, 4 November 2013

Using Vellum

It is time for the Unstampabelles to shine this month, 
and the challenge is to use Vellum on your project somewhere. 


The sponsor for this challenge is Huggies Craft - thanks Beth! 

sideblinkie_zps1af935d9

Prize pack from Huggies Crafts
 consists of:
·         15 x A4 Sheets of card-stock
·         Jenni B Ovals
·         2 pkts of 12 Felt Christmas Icons
·         1 x Making Memories Sheer Frame
·         1 x 1mx9cm Wide Burlap Ribbon
·         1 pkt crafty bitz
·         1 pk Forever Friends Elements
·          2 Pks say it with Crystals

·         1 Pk Bazzil Basic Organza flowers.

I have used vellum on my card by trying to capture a quote on vellum from a booklet I purchased in Joannes (Denver) seven years ago, behind a die cut frame. 


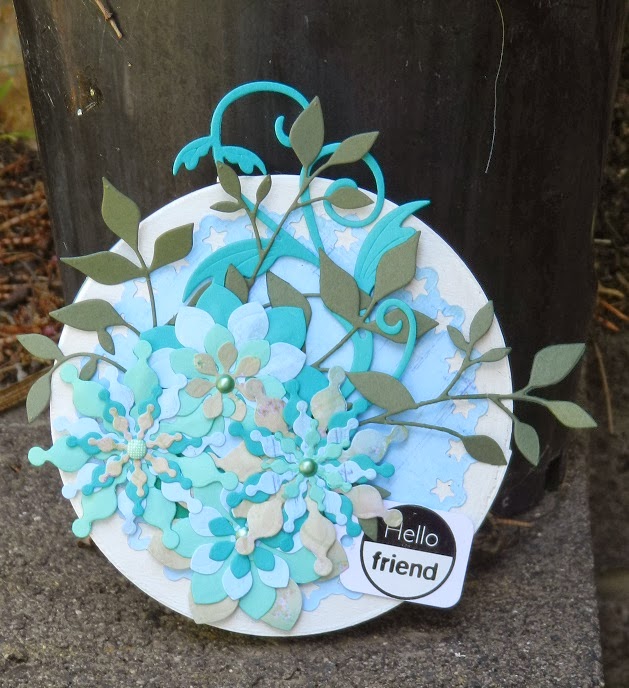
I also die cut some flowers and after trying to shape them I scrunched them up and put a pearl pin in the centre, and swiped some SU Melon Mambo ink around the edges. The vellum used in these is from scraps I had in my vellum supply.


I used a sheet of Firefly (Prima) paper and inked the edges with SU Melon Mambo, and then wrapped it in a strip of lace. This was then placed onto a commercial blank card of cream pearl. I die cut a frame (Spellbinders) and backed it with SU MM card, and then die cut another one and tried to adhere this to the top of the vellum quote. I used glue and unfortunately while manipulating it I creased it too - bummer! 


I added some various flowers from my stash to the bunch, and a piece of scrap pink ribbon. 


I finished by spraying it with gold spray but as it was overcast outside it did not show that well; I have taken the last photo under the light on my desk so the colours are different but you can see that golden glitter. 


I will enter this in the following challenges:
Crafting When We Can: Make your own flowers
Scribble and Scrap: Anything Goes plus comment

Wednesday, 30 October 2013

Making Our Own Flowers

Time for another challenge at Crafting with Dragonflies and this one is to


Create your own Flower Embellishments
 Tell us how or what you did, and if you can add a link great!


You can just have the flowers or put them on something, the sky is the limit, up to you, card, scrap page, box or on their own....made from paper, fabric, gauze, leather, old books, anything....

Our Sponsor for this challenge is Emerald Fairies

The winner will receive two images


For another blog called the Lollipop Ladies, where there is a photo and a twist each fortnight, I made a flower brooch last week.  You can find out all about it here.

For Crafting with Dragonflies I decided to upcycle a balsa wood cheese box, and add the brooch as a topper. 


I painted it with white Gesso to cover up the printing - this is a lovely cheese if you see the box, a beautiful Camembert:  King Island is in Bass Strait between us and the mainland of Australia and is a beautiful place to visit, but if you cannot afford to do that, buy the cheese!


It took three coats of paint to cover it up enough to begin work on it


Like my orchard?  
I used a die cut and adhered it to the centre of the inside bottom of the box, and then added a rub-on. 


I used a piece of washi tape around the outside of the lid of the box. I also die cut another blue piece of card  from the Firefly set and fitted it to the top of the box.  I added the brooch topper and a small tag with another rub-on. 


I thought I could fill it with die cut  flowers as a gift for a friend. 


I had several flowers left over from making the brooch, and was flicking through a new magazine I saw a flower created by folding small squares of paper into cones, and using them as the petals.  So I had a go at that as well. Each petal is one 5 cm x 5 cm square.


I used Firefly DP by Prima, a die cut tag, mounted the back paper onto SU Bermuda Bay card, and then onto some pearl card folded to make a card. 


Initially I tried to work out a good way to fold the cones, and two got a centre fold before I realised that would not work! However, eventually I got it sorted but there are some odd folds in there in places. I added some dots of Liquid Pearls (gold) and I sprayed it all with a gold glitter spray - you can see it under the desk  light inside but it doesn't show in the photos taken outside so well. 


The sentiment is from the SU Happy Day set. 

Hope this gets you inspired to enter our challenge (and even to enter the one at the Lollipop Ladies too if it is still running when you read this), and make a flower embellishment.

I will enter these in the following challenges:
Crafty Sentiments Designs: Anything Goes - the box
Through the Craft Room Door: Anything Goes - the card
Artistic Stamper: Alter something - the box obviously
The Crafting Cafe: Anything Goes - the card


Sunday, 27 October 2013

My Messy Craft Space

Hilde, our fearless leader over at Crafting with Dragonflies, has asked us to take some photos's of our craft area and talk about them a little. Well, this set me to reorganising my space a bit and cleaning up before I took the photo's but I did take some photo's of the messy bits as well! However I have decided not to include these as the posting is already quite long.

Lots of reading here - so maybe a cuppa?

Before I show you this space, I should say I started off at a very small desk build into a wall in the second bedroom. I graduated from that to several card tables and my husband kindly made me a big pine table to sit and work at. I still have that table! Eventually, I outgrew that room - primarily as it is still a guest bedroom, and has a wall of wardrobes! After I retired, I descended to my working space downstairs, where my computer was already set up at the big desk my hubby had made for me when we were first married. I have spent many hours over the years at this desk - firstly marking and preparing lessons, then working on the computer as well and now just blogging and doing the occasional obligatory paper work!

I gradually filled this area - I had bought home from work my standing desk so that joined the other desk and the table. I then got a flat pack cupboard and set of drawers and that was the beginning.  I should also say that hubby built the bookshelves for my library of both work books and fiction, and that these too have grown until there is almost no wall space that is not covered in bookshelves!

So, welcome to my world.

I am downstairs under the main living space with a spiral staircase between. Hubbies wood-working workshop is on the other side of the wall behind the main (computer) desk. He has a part of this space too for his desk and filing cabinets, and some shelving. There is a bathroom and wine storage area (in the shower!) between the two spaces! So, if I need a break......

Just outside the floor-to-ceiling windows is the bottom garden, and the bay, and the hills across the bay. Good inspiration. 
Between the glass walls (windows) to outside I have squeezed this cupboard and drawers.  Paper storage either side and the middle is mostly ribbons plus embellishments. I am going up and up and have almost obscured a lovely crayon drawing I purchased of a ketch in Ireland. Need to lift it a bit higher perhaps? Drawers contain mostly wooded stamps.

Turn right and you see the table hubby first built me to craft on.  Covered with stuff most of the time now. Note the ink storage on rhs - hubby built that too. VERY sturdy and heavy (like all his work!). Under this table is more paper storage, mostly. I use big plastic bins for SU card. The plastic drawers have Momento inks, and current SU ones. The round container has sponge bits for each ink colour stored in it. Behind the plastic is a basket of punches.


On the lhs of the table are two CD towers containing all my non-SU plastic stamps - its full! I store these in SU plastic cases.  Ribbons cascade off this on one side. 


Inside the cupboard is more ribbon (top shelf), re-inkers and TH's inks, pencils and stuff Bottom shelf has chipboards, washi tapes, useful stuff......and paints! Door hanging is sprays and daubers and stuff.....


Turn left and you look at my standing desk where I work (back problems) and it is hard to make out what is what because my hubbies desk and shelves are over the back. The boxes with the x's were made by John to hold my Copics but that collection grew too big so now I have a big black canvas box/bag thing for them and they are stored under the table.  LHS has paper flowers, black box has photos, the RHS has a basket of useful paper bits.  Shelf under has my cutters and rulers, and bling boxes and some extra card and the baskets hanging below that have (lhs) die cuts and similar and (rhs) white card.  The plastic file has embossing powder/tinsel stuff on top and in the top three drawers; then flowers and the bottom purple two are wooden bits and lace.

Under the table is a mess!


Put your back to the cupboard and you look at the internal wall. Shelving has SU cling stamps; boxes of letters; the sentiment sticker collection - the rest of the stickers is on the far wall. The green canvas basket has punches (behind the computer screen). 


Under the desk are the Christmas supplies and the sewing machine!


The wall behind the stair has the wooden SU stamp sets, the extra ribbon, the card stock, made-up items, my painting gear, more die-cuts in baskets, more stickers, albums.....magazines, sewing gear.....small paper pads and in another plastic wheelie on floor that you cannot see, there are other paper pads and freebie papers from magazines.


To the left of this is another cupboard set, with the Big Shot on top and more dies and embossing folders. My Cuttlebug is in the cupboard. The book shelves here hold mostly non-fiction books.  There is a row of MS punches of course. This cupboard has my SU business stuff and lots of supplies and thing needed to assist me in my crafting! The mess on the rhs is made up of w/c painting pads, boxes and things too good to throw away. The easles for painting are in the corner. The lhs is the printer on another cupboard made for me by John. He really is a lovely man. It also houses the computer tower and paper for the printer. I have nearly run completely out of room, and space, and must begin to curtail the spending and start to use up of dispose of the surplus. I do talk a good talk of course.....................