Saturday, 28 March 2015

OK, I succumbed

Yes, I made some Easter stuff. 

I had made some earlier and sent it to Canberra for Grandchildren without photographing it - they really didn't deserve (talking about the cards not the children!) it as they had to be flattish and lightweight and I knew they would last long anyway - but then I got fidgetty and so made some (different) others, and promptly sold them! So I remade two (they take about 15 minutes to make now I know what I am doing) and thought perhaps I should take a photo!

I  used all Stampin' Up card and started by making a 4 x 4cm box

They are meant to be rabbits but they look a bit like mice!

Sixxix Easter egg dies and circle punches and SU punches and dies

It's a tail!

 Eyes and whiskers drawn in but you could use goggle eyes - they just looked a bit creepy


Holds about a dozen or two handfull's of cheap solid chocolate eggs from the supermarket - $10 for a big bag for Easter Egg Hunts (or if you are a teacher, to put into the lolly jar for the kids and other staff members!) they also can hold small Lindt rabbits or similar or several larger eggs or similar.


I put them in cellophane bags for sale and then realised you are not supposed to sell them with chocolate in them!

Bummer. 
I had already sold three
The third one was  a chicken!
I priced them at $6 each - too cheap??


Monday, 23 March 2015

Anything but Peaceful......

.....was what was coming out of my workspace while making this card for the Unstampabelles Challenge #45 - Peace/Harmony! 

I was very calm and purposeful at the beginning, and it all seemed to be in harmony until after I made it and photographed it and started to fix the photo ready for posting. There had been only one small hiccup with the peace symbol (which I had drawn in gold pen and didn't like) in that it was drawn wrongly! So I had hand drawn it onto mirror card and fussycut out the symbol with the knife, and put a small circle of card under it to hid the error. It all looked fine. Until I took it outside to photograph. That's when I noticed IT and the noise began (swearing), as well as the humphing and banging things on the desk and such........


Is it laying an egg or what?

So I fixed it ("cause I am smart, yes?) and rephotographed it, and was starting to fix the photo ready for posting when.........I noticed IT (yes, the second IT!) and the scene, which had subsided into peace, was shattered again!

Yes, the peace symbol is sideways!


Yes, it is now fixed - I promise! I am looking at it now. 
BUT I am NOT photographing it again unless something else is wrong and I notice that!

I could not just move the symbol because as I explained earlier,  I had originally dawn it in gold pen (incorrectly) and had to redo it! So the only thing that could be moved was the bird!! Now, I have turned the circle so it is correctly sitting as it was meant to be but really this card is a comedy of error after error! Perhaps I should have simply started again?

It was meant to be a quick simple card - huh!


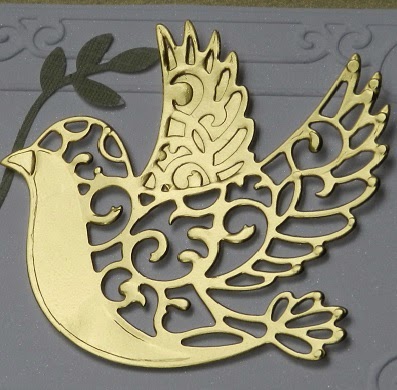
This is the Spellbinder's die cut into gold mirror card


The sprig of green is from the SU bird punch
All the other card is from SU

I am quitting while ahead today!

Please go the Unstampabelles and see the spectacular work of the DT and get inspired to have a go - as I write this on Sunday there are only 6 entries - good odds to win yourself the prize.
Remember - no stamps: but it does not have to be a card!


Monday, 9 March 2015

A Serene and Peaceful Place

A few years ago and group of my old school friends, their partners and some others went back to the area we all grew up in, and started exploring places we had all been to at different times, but not all together - if you get my drift. I grew up on a farm. Next to the coast. We went to a place called locally Hell Fire Bluff, but the maps call it Cape Bernier, which is on the coast. It's on a private road, with a key to unlock the gates to go in. Along the way we stopped for a picnic lunch at a little quiet beach with several streams running down to the water's edge. Here is a photo essay for you.....

the beach

the stream

stopping for lunch

the stream again

This place was so quiet, beautiful and peaceful, full of harmony - so I used one of the photo's to create a step card.


I love the saying by the Dali Lama, and my Kaiser paper has feather's on it!


The black bazzil card is 12 by 7 inches folded at 4, 8 and 10 inches to make the steps. Folds are mountain, valley, mountain. The photo is mounted on some scrap Vanilla card.

We take so many photo's that rarely see the light of day - we should use them more in our work.

This is for Unstampabelles, where the theme is peace and harmony, and the twist is flight.

I will enter this in the following challenges:


Sunday, 8 March 2015

Bubbles wrap it up!

Just learnt a new tip for die cutting.............from FB would you believe! I was scrolling through various conversations in a group I belong to of Australian and NZ Cardmakers, and someone was complaining about dies that don't cut properly. I had never really experienced it myself until just after Christmas, when a very expensive set of Spellbinder's curves gave me grief.


Some lovely woman in the group said she had just two words for us - bubble wrap! Sure, I scoffed to myself - that would work (not!)

Today, when sorting out stuff to go in the bin I came across one of the various attempts I had made to use these dies, and decided to give it a go and see for myself. 

it did flatten the bubble wrap bubbles

This is the result!

Sandwich the base plate, the card, the die, the bubble wrap, the top plate and put onto the magnetic plate of the Big Shot. Wind through - I wound it through twice, but it really only needed once!


I made this card - using the base I made for another card, but made it too small, so had to make another one, leaving this one floating on the desk!


I used Kaiser - Art is Life papers


The 8 x 8 pad has various diecuts in the back and I used three of these for the card. The lacy cut card has a subtle shimmer on it - cannot see it in photo. 

So, I pass it on to you all - bubble wrap in the die cut machine if it is not cutting cleanly  - works a real treat!

Saturday, 7 March 2015

Part of the clean up!

Yes, it is!
You see, there were all these sets of papers and freebies that come with magazines and they are too good to not use up, and they begin to pile up!

Here are two sets of cards made

The first set was pretty papers and a stamp by Rose Studio called Blackberry Lane
I stamped it out five times, coloured it with Copics and used the very pretty papers to make four cards and one bag to carry them in.  All the card used is SU unless stated.  The bag is a repurposed Kaiser carry bag. 


The cards were made following the suggestions in the mags and I didn't want to have to think - where there were no items in my stash to match, I just found something similar. Yes, I am lazy. 


The circle card required a hand-cut circle - stamped sentiments are from various SU sets.


I haven't used this die cut frame before so wanted to experiment with it - the flowers are mostly Prima.


I tried to use my hand held machine but the tension has gone and it didn't behave at all, so my stitching is very dodgy!


The second set was from the Nitwit Collections set in the Creative Magazines gift. It had a lot of die cuts and some pretty papers.


I made a box to hold the cards and it has nine cards in it and there is still some stuff left over. Again, I mostly followed the suggestions in the magazine by Mel Joyce. 


I used commercial blank black cards, and just layered stuff on! I did raid my lace stash a bit!


One card is missing from here and I didn't bother going back and photographing it. It is in the oranges rather than pinks and I used some Crystal Effects on one of the items so it was drying when the rest were being photographed!

Again, SU stamp sets of varying kinds for the sentiments, if there are any.

So, some gift sets to give away or sell, and some mess and piles off the tables!


Monday, 2 March 2015

Peace and Harmony

Challenge #45 at Unstampabelles is all about 

Peace and Harmony


with a TWIST to incorporate flight in your work

The prize is this new die

I started out with a blank black card, and I diecut a rectangle from the front of it
I then took a piece of white card,and started to play with my TH Distress inks and sponges. I cut out a circle for the sun/moon/whatever and a cloud shape and used them to mask out the shape before beginning to sponge. It was a bit like painting with sponges! It was also FUN!


I then went to my Di-namics die of the branch and birds and leaves, and die cut out the various bits and pieces I wanted in various scrap card colours. I then glued the leaves and birds on. By this stage I was doing a bit of a happy dance as it was all looking as if it would work out OK! I placed a piece of card on the inside of my aperture and secured it down as a backing, and slipped the 'painted' background into the shape on the front. L then glued down the branch across the background.


I diecut from white card the sentiment and attached in top left hand corner. Got this little beauty from eBay, along with two other sayings in the same pack. It needed something so I quickly drew around the frame with a white gel pen to frame it more. I had also added some Wink of Stella white to the cloud and the sun, and in some lights they shimmer nicely but it is hard to get it to photograph. 


A peaceful dawn and the twittering of birds creating a harmony!

You should see what else the DT has created over on Unstampabelles!
Go and have a look-see and drool, and then start creating!


Sunday, 1 March 2015

Happy Birthday Glenda

Made this card for a friend's birthday yesterday, suing those delicious Gelato crayons, and some SU stamps, some sequins and dots of gold, and gold glitter paper.


It has a real shimmer from the Gelato's and the gold body of the butterfly is Wink of Stella and very sparkly too. It is copied of course from someone else's idea, but I really liked theirs and I like mine too! I tried to avoid putting the crayon directly onto the WC paper and just washing a very watered down version across the butterfly but had to end up misting the paper to get a decent coverage. I will know next time!

Happy Birthday Glenda!


It's true - it isn't easy going green!

Over at Eclectic Ellapu we in the Purple Team have been asked to go green for the March Challenge!


Image from Google Images

I have thought and thought of what I could do, and jotted down ideas and sketched possible layouts and thought of objects that I might make using mixed media......and did nothing concrete. In fact, I worked in pink and mauve and make a set of very girly cards rather than make anything green...... don't get me wrong, I LOVE green and have at least a third of my wardrobe given over to that colour. It's just making something green....


Then I saw a card by Rebecca Beattie and was inspired to make a splattered, brayered backgrounds using my TH distress inks in various greens, with a touch of oranges/yellows.


Lately I have been aware of all the blackboard style projects, and reminded of the several inspirational saying stamps I own. So I dug out one by MFT (Life's Directions) and started to play with that using the background. The rest just fell into place. I have a TH embossing folder with a brick background, and I have lots of wood embellies that I have been hoarding rather than using.......


 The base card is from my stash of Bazzil card. It is getting a bit low now - might have to go shopping soon! My colour choices are becoming restricted. Anyway, I hope it is suitable and fits the theme. I enjoyed distressing the poster - there is some white paint on there too but it has sort-of faded into the greennessof it all! The best bit is that I have 2/3rds of the piece still available for more green projects now!


Why not to to Eclectic Ellapu and see the wonderful works in green that the Purple team have created - and also the beautiful work from the Pink team - and get thinking. You have a month to enter this challenge for March!


Monday, 23 February 2015

Oh I do like to be beside the seaside........


 One thing people always think of when they think of Australia is BEACHES!
Sun and sand and Lifesavers and such....


Indeed, I think the most famous beach in Australia is Bondi Beach, Sydney (above)

But perhaps one of the most beautiful and lesser known ones is called 
WINE GLASS BAY (Tasmania)


Can you see that small boat? On the RHS?  I have been in that spot or near that spot in a yacht on a number of occasions, and swam in those beautiful waters. I have also once (in my youth) been on top of that line of hills above the beach on the southern side, and later been back there and walked that beach with a pack and a group of school kids for the start of a week's camping in the National Park.

 A bit less crowded than Bondi.

Over at Unstampabelles we have asked you to make a project that reflects something of your country 

February Challenge #44 National Symbols
The twist is to use your country's flag colours in your creation
Just don't use stamps!

The Prize is this collection of new material (value approx $20 Aus) 

Well, my card is about the beach


In Tasmania, the water remains cold right up to December, and it takes a brave person to swim regularly before then without protection ie wet suit. In summer, the briskness of the water is a great counterpoint to the hot days.  Beware sunburn though - we have an hole in the ozone layer over us thanks to the rest of the world, and we burn too readily as a result!


We have to take slip, slop and slap very seriously - slip on a shirt, slop on some sunscreen, and slap on a hat!

Graphic 45: By the Sea Collection is the go here - and some SU card - Night of Navy - plus three white starfish shapes of bling!

Only a week to go to enter this - actually, it closes on the 27th AEST so less than that
You need to get your entry in asap
There are some great ones there already!

Sunday, 22 February 2015

Men's cards.....and other things

Hello everyone - and welcome to the newest followers

I have been trying to clean up my workspace and trying to make sense of all the stash. You know how you accumulate stuff - particularly the freebies from magazines - and other stuff you purchased for a specific idea, and then had some leftovers to deal with?

Well, I have been trying to use up all this stuff or pack it up to give away or throw it out  - relax, little has actually been thrown out!


This male card was one result - the image and sentiment is from Acid Drops and Whatknots. I purchased several sheets of images and sayings - especially Christmas ones - and I may have also got a sheet or two of non-Christmas ones too because they made me laugh.......that's my excuse....and this image is from one such sheet. I really like to others, but the sentiment going with this one was not what I would use, so I fussy cut the young man out and just used that. Also while trawling through the internet I saw a card with the die cut edge and suitable papers underneath - it was a very girly card - and I thought it would work with any colour combo. So, SU Soft Suede card,and paper from my stash, plus a button and some string and some bling. All on a black commercial card blank from Regal Craft. Took me about 10 minutes to make!

I will enter this in the following:
Sister Act: Anything Goes
Scrap and Craft: Anything Goes

The following two are me just showing off as they are very accurately CASed from the magazine where I got the freebie stamp from - Craft Stamper.


A Project Life postcard, SU stamp (Good Greetings) and a black card blank. Washi tape is used for the flags. I paper pieced the camera and added some gloss to the heart and some bling to the flags.I did create some shadow with a Copic grey pen.

The second card is so copied but it looks so good, I thought I would show it off anyway. A die cut film strip, the stamp coloured with Copics and an SU sentiment stamp (Happy Day - masked) and while the original used green acyrlic paint smeared across, I used a Gelato crayon. I used a corner punch to round the corners of the card too. The lens on the camera is glossed with SU Crystal Effects.