Thursday 30 June 2016

Time for a new Eclectic Ellapu Purple Team Challenge


"Life's a beach" 
(holidays, day trips, sand, umbrellas, cocktails, beach games)

 My current time of the year is mid-winter, so a beach is not necessarily a pleasant place to be - sitting under an umbrella sipping Pina Colada's and splashing on lashings of sun screen to protect you from the sun belongs to a different time of the year. 

Sitting on a beach while the angry cold sea surges in and the sky is a grey colour with a weak sun peering through the clouds could be something you would want to do, especially if you had that someone special to snuggle up to  -  pity my husband hates sand and beaches; he prefers to be on the sea, not next to it!


Therefore, when I decided to make a journal page - my second one ever - I went for a more moveable sea and an overcast sky. 


I cannot decide if the couple are on a cliff above the sea or on a beach right next to it!


The sand is texture paste and the sea is also texture paste but it has microbeads in it to make it shimmer and shine. Stencils also help the idea of movement.


A splash perhaps?


The sun is struggling to shine through


 Stencil work around the outside edges; die cut shells attached here and there, and lots of sprays and Dylusional paints and TH inks and the couple are a stamp set that comes from SU's 2009 collection!
There is also more texture paste on the outside edges of the pages at the top to give an idea of clouds....

I was going to add some more die cuts but after I stencilled in the words, I left it  - didn't want to over think it!

Hope it tickles (as Claire would say).........

You will find Eclectic Ellapu HERE 
and there are lots of other cards reflecting summer days at the beach if that is your fancy.......

Monday 27 June 2016

Last week of June and last week for the challenge #59 at Unstampabelles

That time again - only a week to go for you to enter the current challenge #59 at Unstampabelles.


#58: Pocket Books/Letters or Gift Card Holders 

TWIST include a crown

Here's mine!

Yep, this is a challenge to do something different -
  • not just a card; 
  • not just a box; 
  • not just a tag; 
  • not just an album; 
  • not just a scrap page

So, what do we want? 
Basically anything that has a pocket into which you can put photos, tags, images, presents, gift cards.......

This is the prize

I used a D'Lish kit to create a Joy Fold card, and this one as a pocket inside


It is our son's birthday this month, so this is his card
He did spend some time in the US of A so will appreciate the colours!
The wooden objects have been painted and sprayed and painted again to match the colour scheme


The crown didn't arrive until the day it was due to be posted, so was added late. These photo's without it give you some idea of how it was put together


The button holds the edge of the smaller card so it is closed, thus closing the whole card


Inside the card front flap, is a pocket!
Inside the pocket is a gift card
(my membership card is being used here to show size)


Under the red flap of the smaller card, is a place for sentiment and personal comments
The left folds over and then the smaller right ref flap folds over that and slips under the button to effect a close and secure the gift voucher. Perhaps that is why it is called a Joy card!
I could have created my pocket under the red card and made the left flap a place for a sentiment to change it around a little. 

So, another way to incorporate pockets into a project.
You stil lhave until midnight on Friday 1st July to enter this challenge
Go HERE and scroll down to the link.


Saturday 25 June 2016

Sentiment as main focus

....... is what Crafting with Dragonflies is asking for this fortnight.


With that in mind, I went through all my stamps (sorting out into my five full-to-cramming folder's of stamp images cataloged by manufacturer - yes,slightly obsessive) and found lot's I could use until one sang out to me "pick me, pick me!" This happened to be an early one by Claire Brennan of Waltzing Mouse stamps - now closed (sigh) and so I started with this. I think it was because there is so much of a brouhaha happening on social media about men not being nice to other's lately, and this resonated with me. Also  Donald Trump is beginning to really push my buttons with his lack of respect for women in general and anyone who isn't like him in particular, and this message is so pertinent to him.


Then I had a look at a monthly kit I had received from D'Lish lately, and thought I wanted to use those colours, and so it came together. Hope you like it.


I dry embossed some aqua card; used some ribbon from a Llint Chocolate Easter Bunny; embossed the sentiment using my new bronze EP from Stampin' Up; stamped an image of the small boy using an old SU set; and generally threw it onto the card front to see how it went,and then glued it all down.

Card is 15 x 15 cm
All card is SU except the two DP pieces - scraps. 
As I said, the kit stuff is from D'Lish


You can find the Crafting with Dragonflies challenge 


Monday 20 June 2016

Project Life page for Unstampabelle's current challenge: #59

Challenge #59


The theme is 

#58: Pocket Books/Letters or Gift Card Holders 

TWIST include a crown

You can find more information HERE

This is the prize


I decided my pockets this week were going to be plastic ones and so I dug out a Project Life page - took me a while to remember where I had put them though! I originally liked the idea of these but went off them a bit when they arrived and so didn't use them apart from one page.

Now I quite like the effect and if you didn't want to do too much embellishment, they would be very quick to put an album together. Especially if they were about babies and children, I fancy.


This one is based on a holiday we had in Western Australia ten years ago.
A page like this for me would be a starter - the title page if you will
The pockets allow the cards (already supplied with the PL kit) to slip in easily
All I had to do was decorate to choice and add photo's and writing


Die cuts and such - the anchor is wooden
The bowsprit of the ship is pocking out the side of its pocket


This is cardboard and was already die cut when I purchased it
I painted it with Gesso and then sprayed and painted it with turquoise and yellow inks/paints but it didn't look right so I added some Brusho's and a spray of water - WHAM!

I had laid it onto some computer paper in the pizza box to do this and when I lifted it off this was left behind - think I will try and use it as it looks so retro!


Can you see my crown included here (look upward to the photo above this one) for the Twist?
It is a proper naval crown, found and printed off onto paper and fussy cut out.

This is the back of the page - no photo's in there yet but there is room for up to eight and/or space to journal as well on the back of the cards.


 So, off you go and create your own projects using pockets!
Don't forget the Twist either!


Monday 13 June 2016

A Hard Cover Pocket Book for Unstampabelles Challenge

Week two of the challenge at Unstampabelles

WARNING: Photo heavy

#58: Pocket Books/Letters or Gift Card Holders 

TWIST include a crown


The prize

I decided to make another pocket booklet - a mini booklet
This one can be seen here on YouTube

I started with a 12 x 12 sheet and scored at 3", 6" and 9": turn 90 degrees and do the same.


Then cut up from base to 9; down from top to 3; and up from base to 9 as shown below


Starting at the bottom left corner concertina fold up, across, down, across, up, across and down


Yes, I have a different sheet now - the first one was too flimsy again so I went to a sheet of 12 x 12 Bazzil. Worked much better. You need to work out where the top is - if you look at your squashed concertina, you will notice on one side there are two solid folds - see above - across the top; on the other side there is only one. The one with one becomes the top. I attached a piece of paper to the top to make it clear - you can see it still in the photo 2 down.


I then started from the back and working forward, I marked with a pencil where the glue strips or double sided tape was to be place to form pockets. Mark first before adding glue - believe me, slow is best here. Make sure your first 'page' is left out as this is the cover page.


When you add the glue and create the pockets you get cover, three pockets - a blank - three pockets, a cover.You can see that clearly in the photo's; the paper and tweezers indicate where the two covers are and the pocket tops are open, while directly opposite the covers is a 'blank'.


Now cut out two cover sheets 3.25 " square from recycled card material, and the paper to cover these at 4" square. Glue the paper to the square card, leaving a small rim around the outside of the paper. Trim the edges of the paper, and glue the rim to the inside of the cover.


Can you see my notes while watching the video? I had to watch it several times to make it clear what I was attempting! Once I had the cover plates made, I inked the edges of my pages, including the spine


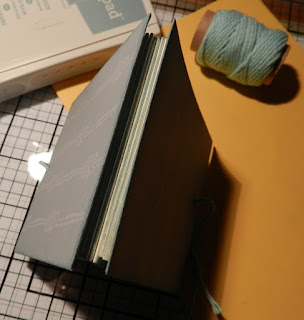
Then carefully attach the covers to the cover plates - I used double sided tape for this. If you want to you can add ribbon at this stage to go between the plates and the cover page, across the back of the spine, with enough length at the front to tie as a closure for the booklet. I forgot to do this, so made do with punching a hole in the cover plates front and back near the front entry, and tying some twine into them, which then ties together to close. It also suited my nautical theme better.
TIP: also make sure your plates face the same way - my cover paper has nautical rope and one plate his it horizontal, and one vertical!


I also inked the edges of my plates


The spine


Now you can decorate - I made 6 tags for the pockets - you could make two for each pocket I guess. These could also hold other material


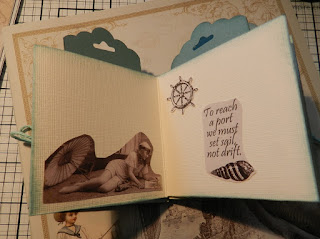
I used papers from Culture Creation's Sea Breeze set to decorate.


You could journal on the pages or on the tag. You could add other photo's or remove the decorations and put photo's there. 


They are just glued in with Sticky Strip


I die cut a few things too


And fussy cut a few others - my dies are on the blank pocket


You can do whatever you wish really


It's up to your imagination


The twist was to add a crown!


The resulting booklet really is quite a cute 3 x 3 inch mini album with front and back covers. It took one 12 x 12 and one A4 sheet of card (for the tags) and some papers to decorate. 

Why not enter this challenge yourself - love to see what you create!

Enter your work HERE


Sunday 12 June 2016

Stop Press: Dragonflies Challenge wants Dragonflies (or Butterflies)!

Yes, you read that correctly


Crafting with Dragonflies has a new challenge


It is to make a card with a dragonfly (or a butterfly) as the main focus


Here you are Hilde..............

Again, I am late - it seems to be a constant with me lately and I hate it!

However, finally got it completed and photographed:


I smeared ink onto a surface sheet, spritzed with water and laid the watercolour paper over it swiping the card through the  wet ink to get a graduated background to represent ground and sky - sorta!

Stamped on some foliage with Stazson black ink and coloured with the SU markers
I used SU inks and the stamp sets are two new ones from the catty
Fabulous Flora and Flowering Fields

There was a bit of masking there too
The sentiment is from the first set
The dragonfly is a cheapie from a $2 shop - I had a sheet of three in varying sizes


Light hitting the card in a different direction shows the colours in the dragonfly winds


The photo below shows the card under lamp light but you can see the Wink of Stella sparkle better on all the flowers


Mounted onto a red card and then onto a piece of Bermuda Bay card for the blank.
Please go to Crafting with Dragonflies to see what else has been created by the excellent (and punctual) design team

PS: Hilde LOVES Dragonflies!