Showing posts with label #68. Show all posts

Monday, 22 May 2017

Best Wishes

Another card this week for the May challenge at Unstampabelles.

The theme is Layers and Borders: 

TWIST use a border punch/die (or two)


I have used an In Colour at Stampin' Up Lime/Lemon
.....such a vibrant green....


My border die is a Die'sire (Crafter's Companion)  - Gorgia


I used a Joy Stencil strip under the flower.


Some SU bits of bling and a die-cut sentiment 
The white card is SU Think Whisper White

Only five days to go for this challenge so best get your brain thinking and your hands working!

Cheers!

Oh sorry - forgot the picture.....


Crescent Bay on the Tasman Peninsula… one of the most beautiful beaches in Tassie, if not the world, and more often than not you will find it all to yourself: thanks to Osborne Heli Tours.

www.instagram.com/osbornehelitours

I will enter this in the following challenge:
Crafting When We Can: bright and colourful
Paper Creator's Craft: bright and bold
Create and Inspire: add a flower


Monday, 15 May 2017

Hope you all had a Happy Mother's Day!

Happy Mother's Day to all who are celebrating this month!


Taken by moi at Agfest last week
'Mum's for Mums........

We are a blended family - and I am a step: Step Grandma and Step Mother. I am very blessed in that my step daughter and son treat me as a friend and I am included in events such as Mother's Day. In Australia this last weekend we celebrated Mother's Day. I went with the family to watch the two eldest Granddaughters play soccer!


Funnily enough for my piece at Unstampabelle's this week, I had dragged out some (very) old photo's of the eldest Grandaughter and scrapped a page with them. The colours were so bright I went with a 70's theme! I had the two girls to myself for a while and we had gone to the Botanical Garden's for the Tulip Festival in about 1997 or 1998. It was a cold day but fine.


A mishmash of this and that.....plus three old photo's
Some borders and frames used and lots of layering....almost too lumpy-bumpy


Orange paint sponged onto the edges for a border
I used a lot of yellow, orange and green, mostly with items from a kit from D'Lish Scraps. 
I missed the deadline for their challenge as well - never mind.....


Wasn't she such an engaging little scamp!
Hard to imagine she is grown up now.


I wasn't going to use a flower until the very end and it just fitted in well so I went with it!
If you are going to be OTT, be OTT I say!


Here is the prize for the challenge at Unstampabelles


Monday, 8 May 2017

Week Two for Unstampabelle's and the May challenge

#68 Layering and Borders

TWIST use a border punch/die (or two)


Today has been a quiet day - the weather outside is cold and overcast, without rain as yet. We are enjoying a visit from the son and also recovering from a lovely day out on Friday at Agfest.  We went to Launceston the day before - yes, took us a long time and the roadworks are infuriating but I can only imagine how much better that road will be as a result, so guess it is worth it. We stayed at a beautiful hotel for one night (The Clarion) and enjoyed a dinner for two in their restaurant. I then enjoyed a fabulous spa bath and another glass of white wine along with my book before going to bed. 

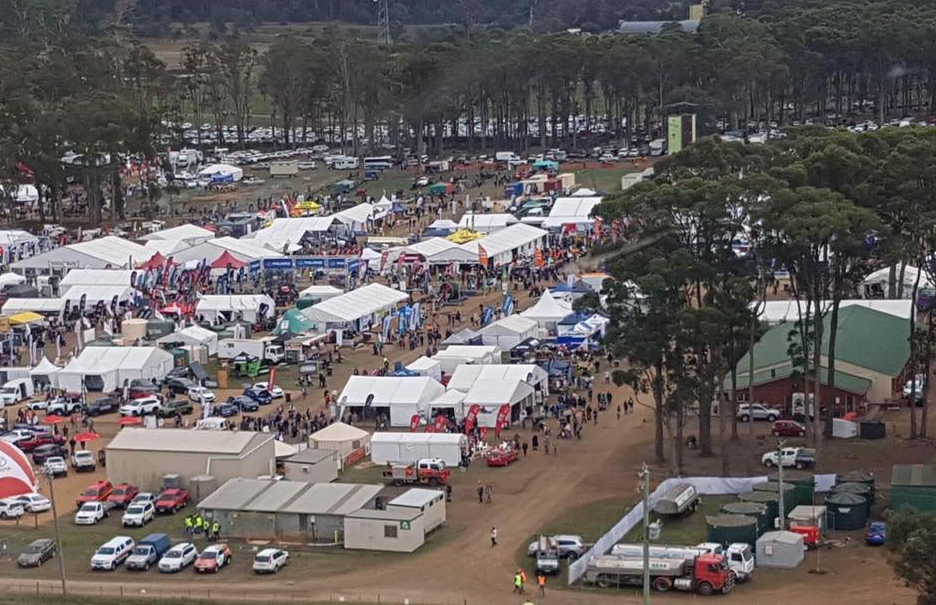
Up early, we arrived in the early morning and had breakfast at the venue. The whole thing is laid out as a huge village - four streets deep and twelve streets wide. This photo might assist you in seeing what it was like - a small part of the site.....

We spend lots of money but didn't actually find the begonia's I was looking for (got them there last visit) so might have to go to a nursery for the new ones. I didn't use my camera until we were leaving - forgot I had it really - and so I missed so many great shots, but here are a few that give a bit of a flavor of the day. 


Guess I should move on to encouraging you all to enter the lastest challenge at 


There is always a random number prize each month


Couture Creations Dies
(New )


I made a card for the week:

I used one of my paper images I have in my stash. 


Plus some dies from Spellbinders
Radiant Rectangles Nestabilities
These created the borders as well as providing layers


There are six layers in total plus the flowers.


Very Vanilla card, sparkly card, gold card, VV card again and the photo


I added three small roses and puts some glitz on them as well


Taken inside on the table with the lamp shine on the black wood


Taken outside with the natural light
Layering can create some very pretty effects

Now it's your turn to layer and add a border effect. 


Monday, 1 May 2017

Challenge #68: Layers from Unstampabelles for May


Challenge #68: Layers

The TWIST is to have a border
by using a die or a punch

There is a prize
2 new Culture Creations dies


First - a picture of the Fagus


A beautiful capture of the fagus covering Tarn Shelf, in the Mt Field National Park, thanks toJoshua Vince Photography.
www.instagram.com/joshuavince_photography 
Deciduous beech (Nothofagus gunnii), or fagus as it is best-known, a humble tree, usually growing to 2 metres or less. You find it in places most would describe as inhospitable. And one of its other names - tanglefoot - is ruefully confirmed by bushwalkers caught up in its twisted, ground-hugging branches. Yet this small Tasmanian tree can claim something few other Australian plants can. It is Australia's only cold climate winter-deciduous tree, and you will find it nowhere else in the world except Tasmania. 

And its autumn display is superb. Fagus turns a spectacular range of autumn colours, from rust red through to brilliant gold, during late April and May.


Inspired by the green in the Fagus, I made a card for the first week


I used a die that embosses as well as cuts - it took me ages to sort it out and I ruined four sheets of good card before I got the impression onto the card as well as the cut. I found the answer here
on Scrapbooking Made Simple

Then I got this clear emboss


The bottom section was die cut twice and layered to lift it up. 
The first die cut was from the top layer of the card
I then fitted the top bits back into the die cut negative after I had layered it
Underneath the whole is a sheet of green sparkly card from SU - 
you can see it sparkling in the sunlight here


You can see it lifted up more on this shot - taken in the shade; more the actual color


Here is the card photographed in the shade too


I wanted just a hit of sparkle around the edges as well but didn't quite get there - I was concentrating on the right side and didn't realise the left was a bit too wide. Oh well. 

You can enter at Unstampabelles by reading the first post for May and scrolling down to the Linky